Sitemaps are small unique XML file, which helps you to connect your site with search engines. So you have to add this sitemap to Google search console, Bing webmaster tools and Yandex webmaster tool to better index your site. One sitemap can’t list more than 50,000 URLs but not more than 50MB in size.
XML Sitemaps are the individual file to show the path from crawlers and spiders. Sometimes Spiders are also known as Crawlers. Every search engine has its crawler.
The primary function of the crawler is to complete the process that includes crawling, indexing of websites, processing and retrieving of results in search engine. Search engine bots follow sitemap files to crawl and index your website. It allows their search engine bots to discover and index your website content easily.

This guide will help submit Sitemap to all significant search engines like Google search console, Bing webmaster tools, and Yandex Webmaster tools.
So need to allow these crawlers to index blog pages in all search engines.
Nevertheless, how? Simple, the webmaster needs to create an XML Sitemap file and submit it to all search engines like Google, Bing, and Yandex.
This post explains how to submit Sitemap to Google and all other search engines like Bing and Yandex.
Before starting this step, it should be ready with an XML sitemap file. In my previous post, I have explained everything about how to create XML Sitemap. By following the guide, creating an XML sitemap becomes easy.
Let us go to the method on How to submit XML Sitemap file?
How to Submit XML sitemap to Google Search Console?
After successfully creating an XML sitemap in the WordPress blog, you should follow the following steps to submit a sitemap to google becomes easy.
Step 1: Log in
Login to Google Search Console, go to the dashboard. If you don’t already have a google search console account, you need to create an account.
Step 2: Add Property
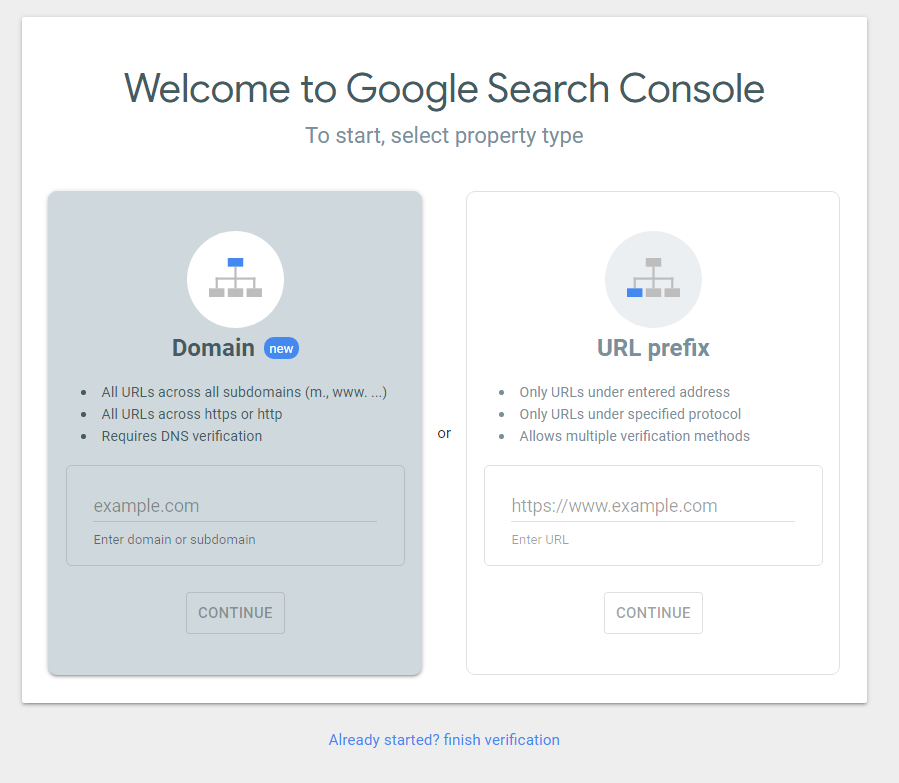
You will be redirected to the Google Search Console dashboard. From your Google search console account, you have to choose either Domain or URL prefix.
- Domain Section: It helps you crawl all the subdomains, mobile pages, www or non-www versions, and http or https versions. It needs manual DNS verification.
- URL Prefix: It is perfect if you are working with your client sites. If you are working with a single domain, this method is perfect.
Then enter the URL in the chosen box and hit on Continue.
Step 3: Verify your Ownership
Now you need to verify your ownership. To do this, you have five methods
- HTML File upload
- HTML Tag (Recommended method)
- Google Analytics
- Google Tag Manager
- Domain name Provider
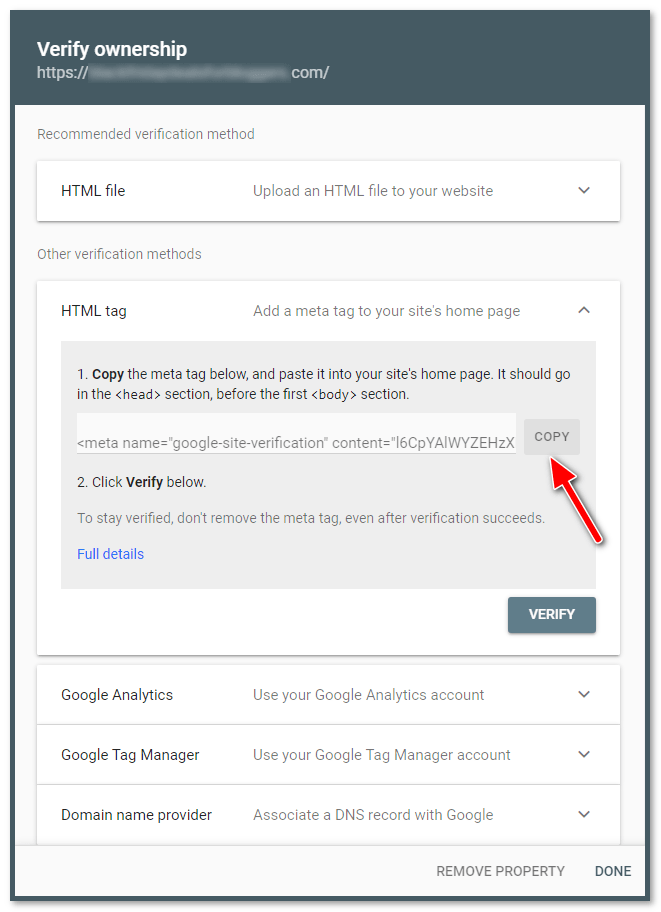
You can choose one method to verify. Here I am using the second method (HTML tag verification method) because this is very simple. To do this, follow the below steps.
- Choose other verification methods > HTML Tag and Copy the Meta tag and paste it into your blog backend section, i.e., before the first <body> section of the <Head> section. (or) If you are a newbie, follow another below step.
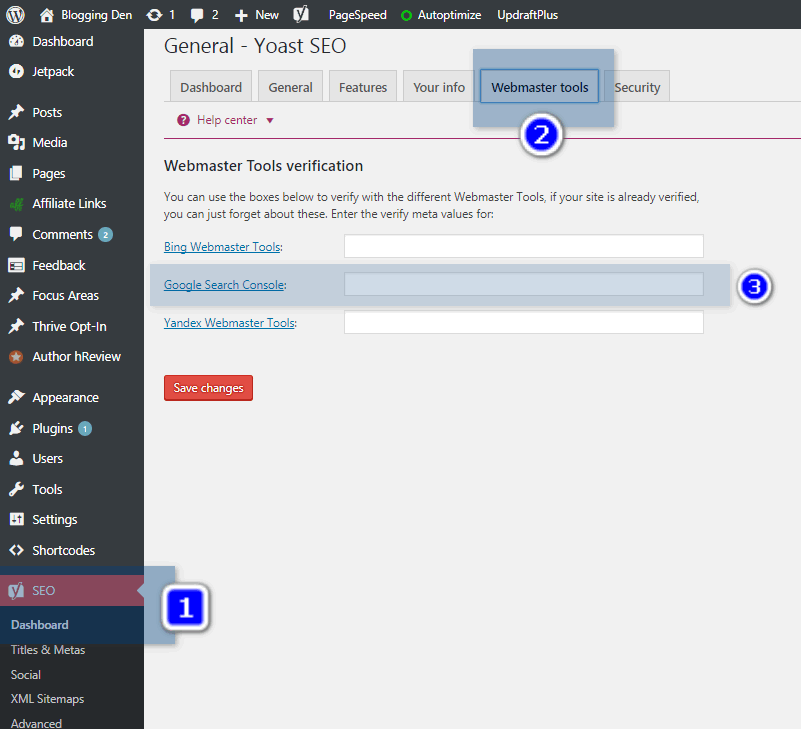
- If you are using Yoast SEO plugin in your WordPress blog, then go for SEO > Dashboard > Webmaster tools. Now page the Meta tag in the Google search console box and Save the changes.
- If you use Rank Math SEO Plugin, go for Rank Math > General Settings > Webmaster tools. And paste Meta tag HTML verification code ID in Google search console field like above Yoast plugin step. Then save the changes.

- Come to the Search Console page and click on the “Verify” button.
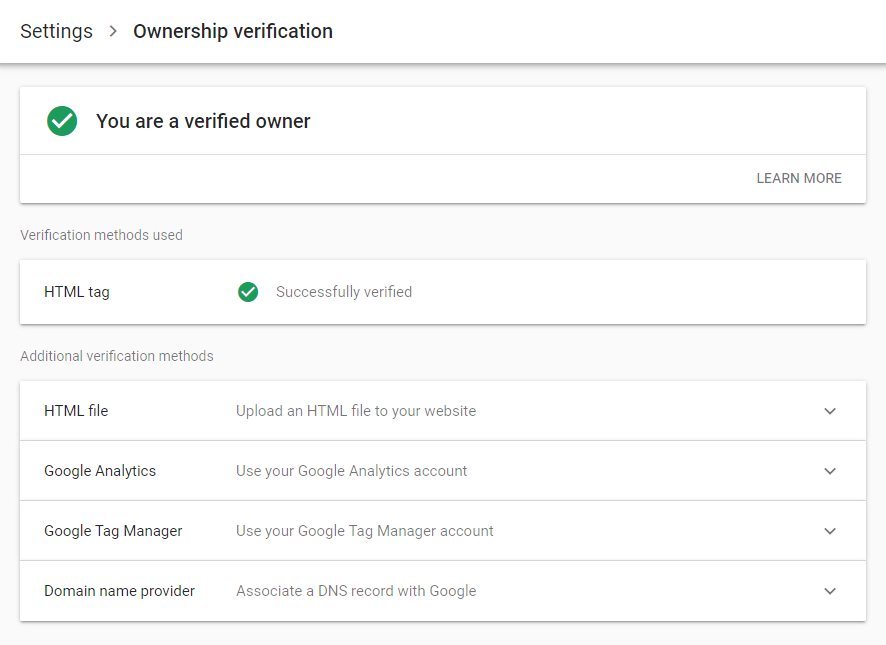
- You will get the Ownership Verification success.
Step 4: Submit Sitemap
The last step is to submit the XML sitemap. After successfully verifying the blog ownership, when you click on the Continue button, it goes to the search console dashboard. Now it is time to submit the XML sitemap. If you are new to XML Sitemap, here is the complete guide on creating an XML sitemap and copying the sitemap URL from the specified source SEO plugin. Then paste it in the Add a new sitemap box and press on submit button.

- After few minutes, Google starts crawling your site by using this unique sitemap feature.
The submitted Sitemap shows pending status up to a few minutes to hours. After that, your blog indexing will be started automatically.
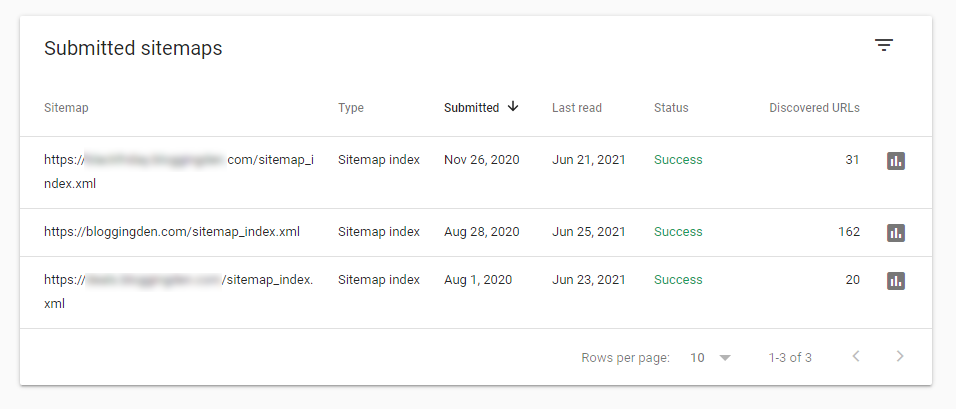
After a few days, check these areas in the search console account for additional information about your blog and follow the Google guidelines. Once you submit your XML sitemap file to Google, You can see all the submitted URLs with updated website content or newly published content available in Google search result pages. you enable search engine crawlers (like Google) to find out what pages are present and which have recently changed and to crawl your site accordingly.
Check Manual Action Section:
- Check the Manual actions page there is any penalty effect on your blog. To check this, go to Security & Manual actions > Manual Actions.

Request for Indexing manually
To submit new URL or Permalink modified URLs or new content updated URLs, you can use the URL Inspection tool at the left side of the Search console to see whether the URL is available to Google. Now enter the page URL in the search bar and press Enter button. You can use the URL inspection tool to confirm which file is being blocked and modify your robots.

Now the crawling will begin to your specified URL page.

Finally you will be redirected to the URL inspection result page. Check the Coverage report and click on Request Indexing. It sends the re-crawling and indexing request to Google search engine.

There are hundreds of Google ranking factors that influence your search engine visibility. The above steps will give the quality google ranking. Suppose the site does not index in Google. In that case, you have to perform the technical SEO audit for your site, like finding broken links, schema issues, website content gaps, critical errors, page speed issues, and many other technical errors. Technical SEO audit is a critical task to know the technical issues. So you have to invest time to fix it.
How to Submit an XML sitemap to Bing Webmaster?
Bing is one of the top search engines from Microsoft. It is available in 40 different languages with its language translation system. So you need to submit your sitemap file to the Bing search engine also.
The process of the submission is the same as sitemap submission to the Google search console. Just follow the below steps to complete your submission and indexing in Bing search engines also.
Steps to submit a sitemap:
Create one new email ID in your Live account and login into your new account
Open Bing Webmaster Tools in a new tab
Enter the login details after pressing the Sign-in button (If you are not logged in)
Enter your Blog URL in My Sites > Add a Site. Then click on Add.
Now enter the Sitemap URL and press Add.
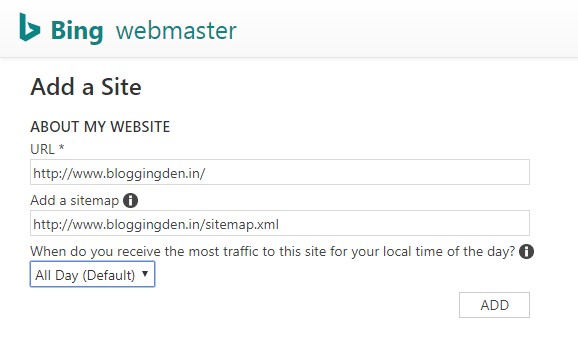
Next, you need to verify your ownership of your domain. There are two options.
Place an XML file on your web server: You need to upload the given file on your web server. This option takes time to verify and needs some advanced knowledge of where to upload and how to upload.

Copy and paste a <meta> tag in your default webpage:
This is a simple method to verify your ownership. To do this, Copy the Meta tag and go to your blog dashboard.
Paste in the Yoast > If you are using Yoast SEO plugin for your WordPress blog, go for SEO > Dashboard > Webmaster tools

Then paste the Meta tag in Bing Webmaster tools box and click on “Save changes”.
Come to Search console page and click on “Verify” button
You will get the Ownership Verification success
That’s it.
How to Submit XML sitemap to Yandex Search Engine?
Yandex is the largest search engine in Russia, with about 65% market shares in that country. It is the 4th largest search engine worldwide, with more than 150 million searches per day.
To submit sitemap here and get good organic traffic. To do this, follow the below steps carefully.
Create one free Yandex Email account and activate your account.
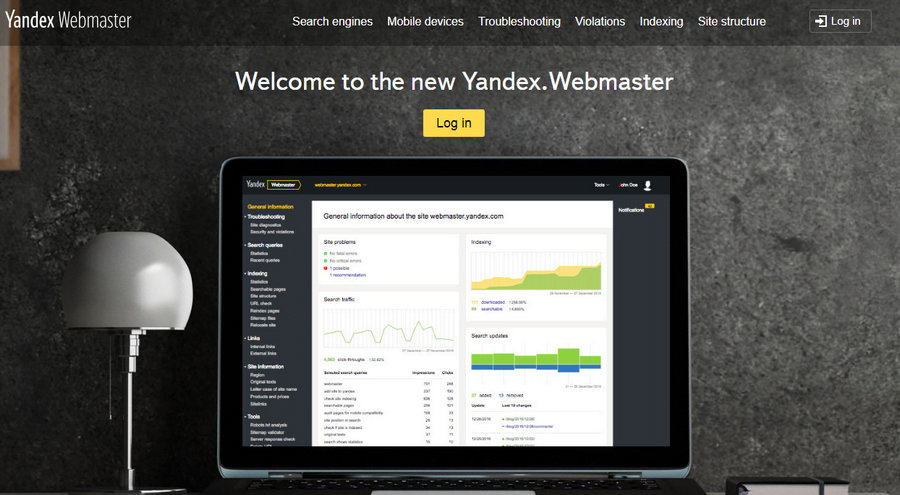
Open the Yandex webmaster in a new tab. Enter step 1 login details.

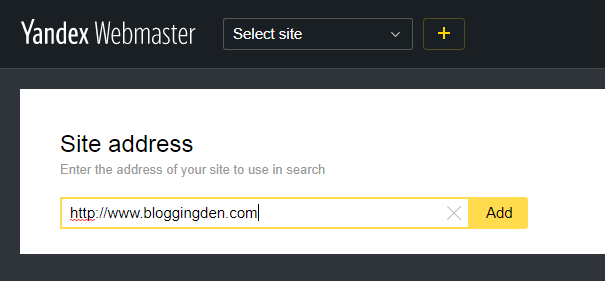
Now you are in the Yandex webmaster dashboard. First, you need to add your blog URL. To do this, click on the “+” button.
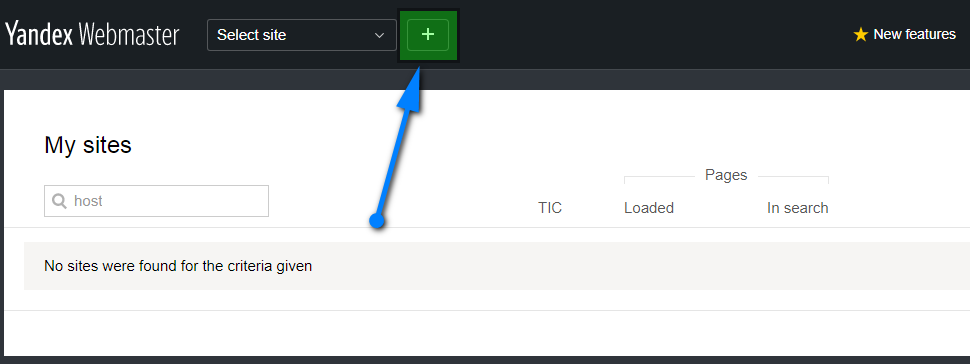
Add blog URL in Site address Here you need to verify your blog ownership like above steps.
Copy the Meta tag from the page and paste it into the Yandex webmaster box on the Yoast plugin settings page. (SEO> Dashboard > Webmaster tools) finally, Save changes.

Then click the “Check” button from the Yandex webmaster page.
Your ownership verification is over. Now you need to submit a sitemap URL file.
Now go for the Yandex webmaster page, indexing> Sitemap files > Add XML sitemap file, add the blog sitemap URL in the box. Click “Add.”
That is it. Yandex crawlers will index your blog.
What about other search engines?
Yahoo site explorer is another search engine that is replaced by Bing Webmaster tools. Ask.com comes under the smallest search engine. Your site can index automatically without submitting any sitemaps because they are not accepting any sitemap submissions.
- Rank math seo plugin: The SEO trending plugin from MyThemeShop
- How to use MailChimp?
- How to build a WordPress blog with Elementor?
- How to Install Google analytics in WordPress?
Final Words:
Search engine submission is significant for every WordPress blog. Manual submissions are beneficial to index your pages effectively. So try to submit your blog sitemap to Google search console, Bing, and Yandex webmaster tools by using the above methods easily.
- 20+ Website Auditing tools for Better Site SEO and Conversions
- Website Auditor Review: Best On-Page and Technical SEO tool Analysis
If you are facing any trouble in this process, do not hesitate. Just use the below comment form to ask your query or use my contact page and get the solution immediately.
The above article on “How to submit XML Sitemap to Google search console, Bing and Yandex webmaster tool” references every WordPress beginner.


Hello Satish,
This is Comprehensive post.
You have covered almost everything on adding WordPress XML Sitemap to all search engines.
All the photos with explanations make the article more easy to understand.
I have learned some new insights from this article.
Thanks
Most helpful articles this plays the vital role of blogging thank you for sharing sir