
9 Best Google AdSense Plugins for WordPress in 2026 for Bloggers (Free & Paid)
If you are running a WordPress blog and want to monetize it with Google AdSense, one of the smartest moves you can make is choosing the right Google AdSense plugin for WordPress. Simply pasting your AdSense code into your theme files might work — but it is far from the most effective approach.
The right WordPress AdSense plugin gives you complete control over ad placement, helps you stay compliant with Google’s policies, and—most importantly—helps you increase AdSense revenue without compromising your site’s speed or user experience.
In 2026, Google AdSense had become significantly smarter. With the introduction of AdSense Auto Ads, Google’s AI now automatically identifies the best positions on your page to display ads.
But even with Auto Ads, having a dedicated WordPress ad management plugin allows you to fine-tune placements, run A/B tests, and manage multiple ad units across different pages — all from a single dashboard.

Whether you are a beginner looking for the best free AdSense plugin for WordPress or an experienced blogger searching for an advanced WordPress advertising plugin to maximize your RPM and CTR, this guide has you covered.
In this post, we have handpicked the 12 best Google AdSense plugins for WordPress in 2026 — both free and paid — based on ease of use, ad placement flexibility, page speed impact, and revenue optimization potential.
We have also included a step-by-step guide on how to add AdSense to WordPress, the best ad placement strategies for maximum CTR, and answers to the most frequently asked questions.
Let’s dive in and find the perfect AdSense integration plugin for your WordPress site.
Quick Overview — What You Will Learn:
- The 9 best WordPress AdSense plugins (free & paid) in 2026
- How to display Google ads in WordPress without coding
- The best ad placement positions to increase AdSense CTR
- Whether Google Auto Ads is right for your blog
- Expert tips to boost your AdSense revenue using WordPress plugins
💡 Pro Tip: If you haven’t yet received AdSense approval for your blog, check out our detailed guide on How to Get Google AdSense Approval Fast before proceeding.
What to Look for in a WordPress AdSense Plugin
With dozens of WordPress AdSense plugins available in 2026, choosing the wrong one can cost you revenue, hurt your site speed, or even put your Google AdSense account at risk. Before we dive into the plugin recommendations, here are the five critical factors you must evaluate before making your choice.
1. AdSense Policy Compliance
This is non-negotiable. Google AdSense has strict policies around ad placement, ad density, and click behavior. A plugin that does not respect these rules — such as placing ads too close to navigation buttons or auto-refreshing ad units — can lead to policy violations or even account suspension.
Always choose a plugin that:
- Is regularly updated to align with Google’s latest AdSense programme policies
- Does not enable deceptive ad placements by default
- Includes built-in click fraud protection or is compatible with dedicated protection plugins
Best Practice: Plugins like Advanced Ads and Ad Inserter Pro are specifically built with AdSense compliance in mind and are trusted by hundreds of thousands of WordPress bloggers worldwide.
2. Ad Placement Flexibility
Not all ad positions deliver equal results. A quality WordPress ad management plugin should give you full flexibility to display ads in multiple strategic locations, including the following:
- Above the fold—high visibility, strong CTR, but must not dominate the viewport
- In-content ads—Placed after the first or second paragraph; one of the highest-performing AdSense positions
- Sidebar ads—Sticky sidebar ads work exceptionally well on desktop traffic
- Before/After post content — Captures reader attention at natural pause points
- In-feed & In-article ads—ideal for magazine-style or news blogs with heavy listing pages
The more granular control a plugin offers—such as targeting specific posts, categories, user roles, or device types—the better your chances of optimizing ad revenue without annoying your readers.
3. Page Speed Impact
In 2026, Core Web Vitals will remain a critical Google ranking factor. A poorly optimized ad plugin can significantly increase your Largest Contentful Paint (LCP) and Cumulative Layout Shift (CLS) scores, directly hurting both your rankings and user experience.
When evaluating a plugin, look for:
- Lazy loading support—loads ads only when they enter the user’s viewport
- Asynchronous ad loading — Prevents ads from blocking page rendering
- Minimal script bloat—lightweight plugins that don’t add unnecessary CSS or JavaScript
- Compatibility with caching plugins like WP Rocket or LiteSpeed Cache
💡 Pro Tip: Always test your site speed on Google PageSpeed Insights before and after installing an ad plugin to measure its real-world performance impact.
4. Support for Google Auto Ads
Google AdSense Auto Ads use machine learning to automatically identify the best placements on your page and display the most relevant ad formats—including anchor ads, vignette ads, in-page ads, and multiplex ads.
A modern WordPress AdSense plugin should
- Make it easy to integrate the Auto Ads code across your entire site in one click
- Allow you to exclude specific pages or post types from Auto Ads (e.g., checkout pages, landing pages)
- Give you the option to combine Auto Ads with manually placed ad units for maximum coverage
- Offer controls to limit the number of Auto Ads shown per page to prevent over-monetization.
Plugins like Google Site Kit offer native Auto Ads support directly from your WordPress dashboard, making it an excellent choice for beginners.
5. Reporting & Analytics
Placing ads on your site is only half the job. To consistently increase your AdSense revenue, you need to know which ad units are performing, which placements are generating the most clicks, and which pages are driving the highest RPM.
Look for a plugin that offers:
- Built-in AdSense performance reporting — Impressions, clicks, CTR, and estimated earnings
- Integration with Google Analytics — To correlate ad performance with traffic data
- A/B testing capabilities—Test different ad sizes, positions, and colours to find the best-performing combinations
- Heatmap or click tracking support—to visually understand where users engage most on your pages
Recommended combo: Pair Advanced Ads for ad management with MonsterInsights for tracking AdSense performance directly inside your WordPress dashboard, giving you a complete revenue intelligence setup.
Quick Checklist — Before You Choose a Plugin
| Factor | Why It Matters |
|---|---|
| AdSense Policy Compliance | Protects your account from suspension |
| Ad Placement Flexibility | Maximises CTR across different page sections |
| Page Speed Impact | Protects Core Web Vitals & Google rankings |
| Auto Ads Support | Enables AI-powered revenue optimization. |
| Reporting & Analytics | Helps you make data-driven revenue decisions |
Now that you know exactly what separates a great AdSense plugin from an average one, let’s explore the 12 best Google AdSense plugins for WordPress in 2026 in detail.
9 Best Google AdSense Plugins for WordPress in 2026
Choosing the right plugin can be the difference between a blog that barely breaks even and one that consistently generates strong AdSense revenue. Below are the 9 best Google AdSense plugins for WordPress in 2026, carefully selected based on features, reliability, page speed impact, and real-world performance.
1. Advanced Ads
Best Overall WordPress AdSense Plugin ⭐ (#1 Recommendation)
Advanced Ads is, without question, the most powerful and flexible Google AdSense plugin for WordPress available in 2026. With over 200,000+ active installations and a near-perfect rating on WordPress.org, it is the go-to choice for bloggers, publishers, and digital marketers who are serious about ad revenue optimization.
Originally built specifically for AdSense, Advanced Ads has evolved into a full-featured WordPress ad management plugin that supports virtually every ad network—including Google AdSense, Google Ad Manager (DFP), Amazon Associates, and custom HTML banners.
Key Features
- Unlimited ad units — Create and manage as many ads as needed with zero restrictions
- Advanced ad targeting — Display or hide ads based on post type, category, tag, user role, device type, browser, referrer, and more
- Ad scheduling — Set start and end dates for time-sensitive campaigns
- Lazy loading support — Improves Core Web Vitals by loading ads only when visible
- A/B split testing — Test multiple ad variations to identify the highest-performing placements
- Google Auto Ads integration — Easily embed your Auto Ads code site-wide with one click
- Click fraud protection — Built-in support with the AICP plugin integration
- Ad blocker detection — Show alternative content to users with ad blockers enabled
- Gutenberg & Elementor compatible — Place ads directly inside the block editor or page builders
- Detailed ad performance stats — Track impressions and clicks from within your WordPress dashboard
Pros & Cons of Advanced Ads
Pros:
- Extremely flexible targeting and placement options
- Fully compliant with Google AdSense policies
- Lightweight with minimal impact on page speed
- Regular updates with active developer support
- The free version is genuinely powerful for small publishers
Cons:
- The interface has a learning curve for complete beginners
- Advanced features like A/B testing and sticky ads require paid add-ons
- Full feature set requires purchasing multiple add-ons, which can add up
Pricing of Advanced Ads
- Free Version — Available on WordPress.org with core ad management features
- Advanced Ads Pro — Starts at $49/year (1 site); includes sticky ads, ad scheduling, and more
- All Access Bundle — Starts at $99/year; includes all add-ons (A/B testing, ad blocker, tracking)
Why Advanced Ads Is the Top Choice in 2026
In 2026, with Google’s increasing focus on page experience signals and ad policy enforcement, you need a plugin that is both powerful and safe. Advanced Ads strikes that balance perfectly. Its granular targeting, lazy loading, Auto Ads support, and active development make it the most future-proof AdSense plugin for WordPress on the market today.
Best For: Bloggers and publishers of all sizes who want full control over their ad placements and revenue optimization.
2. Google Site Kit
Best WordPress Plugin from Google for Beginners
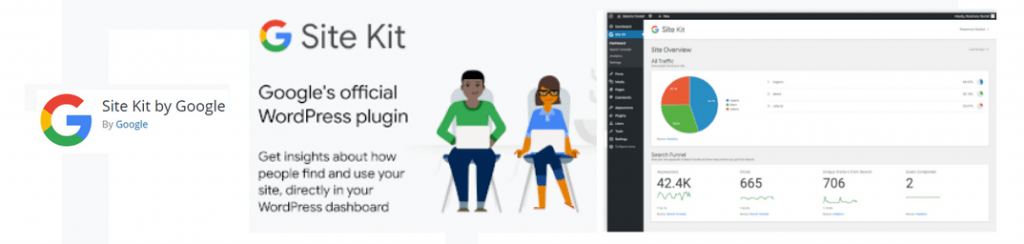
Google Site Kit is the official free WordPress plugin by Google, and it remains one of the most widely used AdSense integration tools for WordPress in 2026.
If you are just starting out and want the simplest way to connect your WordPress site with Google’s ecosystem, Site Kit is the first plugin you should install.
What makes Site Kit unique is that it brings multiple Google products into a single WordPress dashboard—eliminating the need to switch between different platforms to monitor your site’s performance.
Key Features of Google Site Kit
- One-click AdSense integration — Connect your AdSense account and start showing ads within minutes
- Google Auto Ads support — Automatically place and optimise ads using Google’s machine learning
- Unified dashboard — View data from Google AdSense, Google Analytics 4, Google Search Console, and PageSpeed Insights in one place
- AdSense approval integration — Helps new bloggers complete the AdSense site review process directly from WordPress
- No coding required — Completely beginner-friendly setup wizard
- Free and officially maintained by Google — Guaranteed compatibility with the latest AdSense API
Pros & Cons of Google Site Kit
Pros:
- 100% free with no premium upsells
- Officially developed and maintained by Google
- Simplifies the entire AdSense setup process for beginners
- Combines Analytics + Search Console + AdSense in one plugin
- Automatically handles Auto Ads placement
Cons:
- Limited manual ad placement control — you cannot specify exact positions
- Relies heavily on Auto Ads, which may not always be optimal for revenue
- No A/B testing or advanced targeting features
- Can slow down the dashboard for sites with large amounts of data
Pricing: 100% Free—No paid version
Best For: New bloggers and beginners who want a quick, hassle-free way to connect AdSense to WordPress and get Auto Ads running without any technical setup.
3. Ad Inserter Pro
Best for Developers & Advanced Users
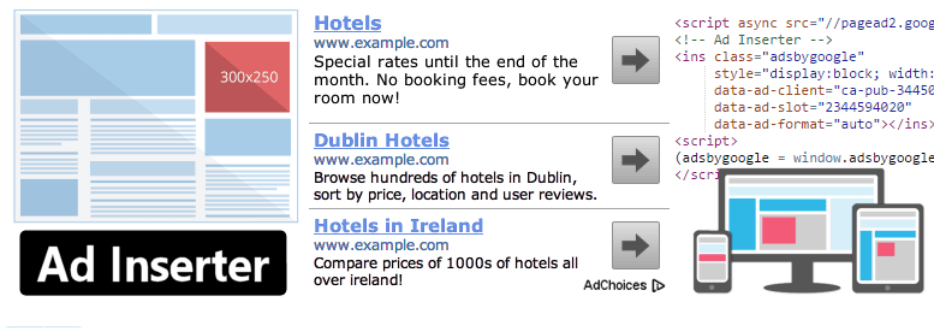
Ad Inserter is one of the most technically advanced WordPress advertising plugins available, making it the preferred choice for developers and power users who need precise, condition-based ad insertion logic.
With 16+ configurable code blocks, Ad Inserter gives you unmatched flexibility in defining exactly where, when, and how ads appear on your site — all without writing a single line of custom PHP.
Key Features of Ad Inserter
- 16+ independent code blocks — Each block can be configured with unique placement rules
- Advanced placement logic — Insert ads before/after paragraphs, at a specific paragraph number, before/after images, between comments, and more
- Conditional display rules — Show or hide ads based on post ID, category, tag, custom taxonomy, user role, device, and referrer
- A/B testing — Test different ad units and placements to determine which drives the best CTR and RPM
- AdSense, Amazon, and custom HTML support — Works with any ad network
- Syntax highlighting editor — Makes managing complex ad code significantly easier
- Sticky and fixed-position ads — Display persistent ads in the header, footer, or sidebar
- Debugging tools — Visual display of ad insertion points for easy troubleshooting
Pros & Cons of Ad Inserter
Pros:
- Unmatched placement logic and customisation depth
- Excellent A/B testing functionality
- Works with every major ad network
- The free version is very capable for most use cases
- Active development and strong user reviews
Cons:
- The interface is intimidating for non-technical users
- No built-in ad performance analytics
- Requires time to properly configure for maximum results
Pricing
- Free Version — Available on WordPress.org with core features
- Ad Inserter Pro — Starts at $20/year (1 site); unlocks A/B testing, advanced scheduling, and geo-targeting.
Best For: Developers, SEO analysts, and advanced bloggers who need precise, condition-based ad insertion with A/B testing capabilities.
4. WP QUADS
Best for Responsive Ad Sizing
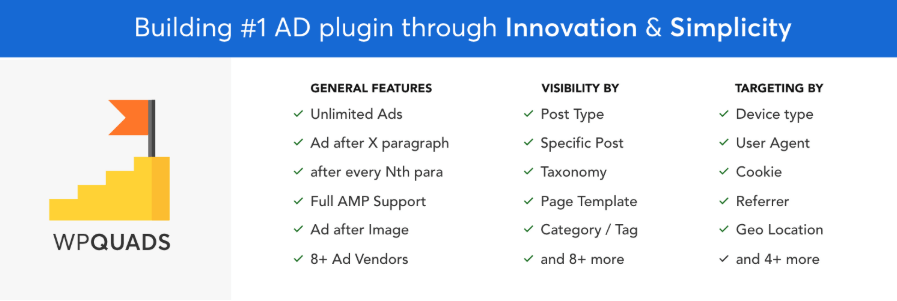
WP QUADS, short for Quick AdSense Reloaded is a lightweight, Google TOS-compliant WordPress AdSense plugin designed specifically for bloggers who want a clean, simple, and fast way to insert AdSense ads into their content.
It is particularly well-regarded for its responsive ad handling, ensuring your ads automatically resize and display correctly across desktops, tablets, and mobile devices — a critical factor given that mobile traffic now accounts for the majority of web visits in 2026.
Key Features of WPQUADS
- 10 ad positions — Including before/after content, middle of post, sidebar widget, and custom shortcode positions
- Responsive ad units — Ads automatically adapt to any screen size, fully compatible with Google’s responsive ad code
- Google AdSense Auto Ads support — Embed Auto Ads with a single toggle
- AMP support — Compatible with Accelerated Mobile Pages for faster mobile ad delivery
- GDPR-ready — Includes consent management for European traffic compliance
- Ad refresh on ajax navigation — Ensures ads reload correctly on single-page WordPress themes
- No coding required — Simple visual setup suitable for all skill levels
- Multisite compatible — Manage ads across a WordPress multisite network
Pros & Cons of WPQUADS
Pros:
- Extremely lightweight — minimal page speed impact
- Fully responsive and mobile-optimised out of the box
- AMP and GDPR compliance built in
- Clean, beginner-friendly interface
- Free version covers all essential placement needs
Cons:
- Limited to 10 fixed ad positions — less flexible than Advanced Ads or Ad Inserter
- No A/B testing in the free version
- Reporting and analytics are basic
Pricing
- Free Version — Available on WordPress.org
- WP QUADS Pro — Starts at $29/year (1 site); unlocks additional ad positions, priority support, and advanced targeting
Best For: Bloggers who prioritise page speed and mobile responsiveness and want a straightforward, Google-compliant plugin for placing AdSense ads in standard positions.
5. AdRotate Banner Manager
Best for Ad Rotation & Multi-Network Management
AdRotate is a versatile WordPress ad management plugin that goes beyond AdSense alone. It is the ideal choice for publishers who run ads from multiple networks—such as Google AdSense, Google Ad Manager (DFP), Media.net, Amazon Associates, and direct ad sales—all from a single unified interface.
Its core strength lies in ad rotation, which allows you to display multiple ad units in the same position on a rotating basis—preventing ad blindness and keeping your inventory fresh for returning visitors.
Key Features
- Ad rotation — Rotate multiple ads in the same slot with customisable frequency settings
- A/B testing — Test ad variations to identify the best-performing combinations
- Multi-network support — Compatible with Google AdSense, DFP/Ad Manager, Media.net, Amazon Associates, and custom HTML ads
- Ad scheduling — Set precise start and end times for individual ad campaigns
- Geo-targeting (Pro) — Display different ads to visitors based on their country or region
- Mobile targeting (Pro) — Serve device-specific ads to desktop and mobile users separately
- Ad performance stats — Track impressions and clicks directly in your dashboard
- Ad groups — Organise multiple ads into groups for easier management across large sites
- GDPR-compliant — Includes built-in consent options for European visitors
Pros & Cons
Pros:
- Excellent ad rotation to combat ad blindness
- Supports virtually every ad network in one plugin
- Strong scheduling and campaign management features
- The free version is genuinely useful for small publishers
- Clean, intuitive interface even for non-technical users
Cons:
- Advanced targeting (geo, mobile) is locked behind the Pro version
- No native lazy loading support
- Analytics are basic compared to dedicated tools like MonsterInsights
Pricing: AdRotate Pro: Starts at €59/year (~$64/year) for a single site; includes geo-targeting, mobile targeting, advanced scheduling, and priority support
Best For: Publishers managing multiple ad networks simultaneously or bloggers who want to combat ad blindness through intelligent ad rotation and scheduling.
6. Easy Adsense Injection
Best for Condition-Based Ad Control

Easy Adsense Injection Plugin is a straightforward and flexible WordPress plugin that lets you quickly insert Google AdSense (or any other ad code) into your posts, pages, and theme areas without touching core files. It supports both automatic and manual ad placement, making it suitable for beginners and advanced users who want more control.
This plugin allows you to save your AdSense code in the settings and then inject it wherever you want using shortcodes, template functions, or automatic placement rules. You can use it not only for AdSense but also for other display ads or custom scripts, so it works as a general ad injection solution for WordPress sites.
Key Features
- Automatic ad placement above the header, below the post title, between paragraphs, below post content, and below the footer.
- Manual placement via shortcodes inside content (up to five different ad slots).
- Theme integration using PHP functions to place ads in specific template locations.
- Supports any ad network or custom HTML/JavaScript (AdSense, affiliate banners, direct ads, etc.).
- Simple settings page to paste and manage your ad codes.
- Compatible with most WordPress themes and layouts.
Pros and Cons of Easy Adsense Injection
Pros
- Easy to use for both automatic and manual ad injection.
- Can handle multiple ad positions without extra plugins.
- Works with any kind of ad code, not just AdSense.
- Ideal for users who prefer shortcodes and template functions.
Cons
- Interface is more basic compared to advanced ad managers like Advanced Ads or Ad Inserter.
- No built-in A/B testing or detailed analytics.
- Smaller active install base compared to more popular ad plugins.
Best For: Best for bloggers who want a simple, shortcode-based AdSense injection plugin that supports both automatic and manual placements without the complexity of a full ad management suite.
7. WP AdCenter
Best for Selling Direct Ads + AdSense
WP AdCenter is a robust self-serve WordPress ad management plugin designed for publishers who want to run both Google AdSense and direct ad sales from a single platform.
If your blog has grown to a point where advertisers are approaching you directly for banner placements, WP AdCenter bridges the gap between AdSense auto-monetization and manual ad deal management.
Key Features
- Self-serve ad marketplace—Advertisers can purchase ad slots directly on your site through a built-in booking system
- Multiple ad zone management—Create unlimited ad zones across headers, sidebars, footers, and in-content areas
- AdSense fallback ads—Automatically display AdSense ads when no direct advertiser has purchased a slot — ensuring zero revenue dead zones
- Ad expiry & scheduling — Set campaign durations with automatic expiry and renewal notifications
- Payment integration — Accepts payments via PayPal and Stripe for direct ad bookings
- Responsive ad zones—All ad placements are fully mobile-responsive
- Ad performance dashboard — Track impressions, clicks, and revenue from direct ads in one place
Pros & Cons
Pros:
- Combines direct ad sales and AdSense in one plugin—ideal for growing blogs
- AdSense fallback ensures you never lose revenue from empty ad slots
- Built-in payment processing eliminates the need for third-party invoicing
- Clean, professional interface for both publishers and advertisers
Cons:
- Overkill for blogs that only use AdSense without direct ad sales
- Payment features and advanced zones require the Pro version
- Smaller community and fewer third-party reviews compared to Advanced Ads
Pricing
- Free Version — Available on WordPress.org with basic ad zone management
- WP AdCenter Pro — Starts at $59/year (1 site); unlocks self-serve marketplace, payment integration, and advanced reporting.
Best For: Established bloggers and content publishers who want to sell direct banner ads to advertisers while using AdSense as a revenue fallback for unsold inventory.
8. WPCode
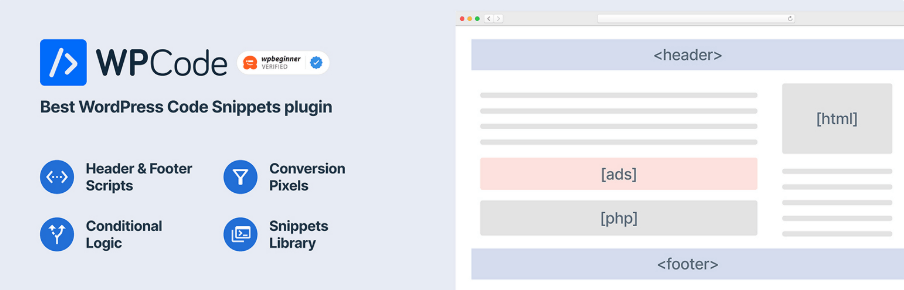
WPCode, previously known as Insert Headers and Footers, has grown from a simple code insertion tool into one of the most powerful code snippet management plugins for WordPress in 2026.
For AdSense publishers, it provides a clean, organized way to insert, schedule, and manage ad code snippets across your site—without ever touching your theme files.
Its standout 2026 feature — the AI Snippet Generator — allows you to generate custom ad banner code, structured data, and tracking scripts using natural language prompts, making it a genuinely innovative tool for modern WordPress bloggers.
Key Features
- Header & footer code insertion—Add your AdSense Auto Ads code site-wide in seconds without editing functions.php
- Conditional logic — Show or hide specific ad code snippets on particular pages, posts, post types, or user roles
- Ad scheduling — Set specific date ranges for ad code to be active—ideal for seasonal campaigns
- AI Snippet Generator (Pro) — Generate custom ad code, Schema markup, and tracking scripts using AI-powered natural language input
- Snippet library — Access a growing library of pre-built code snippets for common AdSense configurations
- Error handling — Automatically disables broken snippets to prevent site crashes
- Revision history — Roll back to previous versions of any snippet if something goes wrong
- Cloud sync (Pro) — Sync snippets across multiple WordPress sites from one account
Pros & Cons
Pros:
- Safest way to add AdSense code without modifying theme files
- AI Snippet Generator saves significant time for advanced configurations
- Conditional logic enables page-level ad code control
- Prevents site crashes through built-in snippet error handling
- The free version is excellent for basic AdSense code insertion
Cons:
- Not a traditional ad management plugin — no visual ad position selector
- AI features require the Pro version
- Does not provide AdSense performance reporting
Pricing
- Free Version — Available on WordPress.org
- WPCode Pro — Starts at $49/year (1 site); includes AI Snippet Generator, cloud sync, and advanced conditional logic
Best For: Bloggers who want a safe, organized, and theme-independent way to manage their AdSense code across their entire site, with the added benefit of AI-powered snippet generation in 2026.
9. AdsforWP
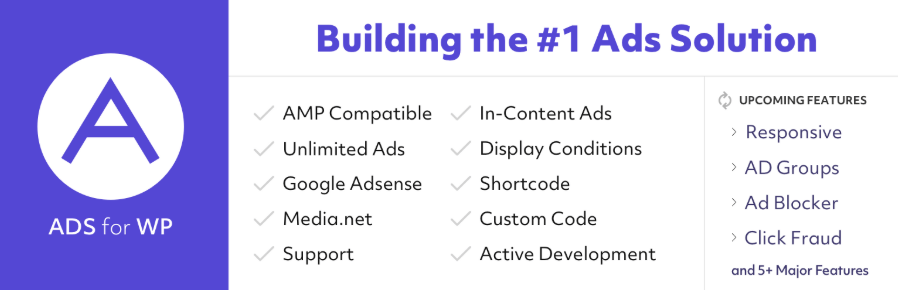
Easy Google AdSense and Banner Ads Manager (AdsforWP) is a feature-rich, lightweight WordPress plugin designed to manage Google AdSense, banner ads, and other ad networks on both normal and AMP pages.
It focuses on automation, clean placement controls, and full AMP compatibility, making it a strong choice for bloggers who care about mobile traffic and page speed.
AdsforWP lets you create unlimited ad units and display them in precise positions inside posts, pages, sidebars, and AMP versions without editing your theme files.
It supports Google AdSense, Media.net, custom HTML/JS ads, and native ad vendors, with display conditions so you can control exactly where each ad appears.
Key Features of AdsforWP
- Easy AdSense integration with a simple interface to add and manage ad codes
- Full AMP support so ads display correctly on AMP pages
- In‑content injection after specific paragraphs for higher in‑content CTR
- Unlimited ads and placements with individual display conditions
- Post‑specific controls to enable or disable ads on particular posts or pages
- Support for native ad vendors, along with AdSense
- Custom code support for HTML, JavaScript, or third‑party ad scripts
- Shortcode generator to manually insert ads anywhere inside the content
Pros and Cons of AdsforWP
Pros
- Built specifically with AdSense and AMP usage in mind
- Flexible placement options, including in‑content and widget areas
- Supports multiple ad networks and native ads, not only AdSense
- Unlimited ad units and conditions make it suitable for growing blogs
Cons
- Options and interface can feel a bit complex for complete beginners
- No built‑in A/B testing like some advanced ad managers
- Reporting is basic compared to dedicated analytics plugins
Best For: Best for bloggers who use AMP and want a lightweight yet powerful AdSense and banner ad manager that supports multiple networks, in‑content placements, and AMP compatibility without needing to write code.
How to Add Google AdSense to WordPress (Step-by-Step)
Adding Google AdSense to your WordPress site is easier than ever in 2026, thanks to dedicated plugins that eliminate the need to manually edit theme files. Below are the three most reliable methods, ranging from the simplest beginner approach to the most flexible advanced setup.
Before You Begin — Prerequisites Checklist
Before connecting AdSense to WordPress, ensure the following are in place:
- Your Google AdSense account is approved and active
- Your WordPress site is live with a valid domain
- Your site has sufficient content (minimum 15–20 quality posts)
- You have Admin access to your WordPress dashboard
- Your site has a Privacy Policy page published
- You have installed an SSL certificate (https://) on your domain💡 Not yet approved? Read our detailed guide on How to Get Google AdSense Approval Fast before proceeding.
Method 1: Using Google Site Kit
(Easiest — Recommended for Beginners)
Google Site Kit is the fastest and most beginner-friendly way to connect AdSense to WordPress. Since it is the official Google plugin, the entire setup is guided and requires zero coding.
Step 1: Install Google Site Kit
- Go to your WordPress Dashboard → Plugins → Add New
- Search for “Google Site Kit”
- Click Install Now, then Activate
Step 2: Launch the Setup Wizard
- After activation, click “Site Kit” in your left sidebar
- Click “Start Setup” and sign in with your Google account
- Grant the requested permissions to connect to Google services
Step 3: Connect Google Search Console
- Site Kit will first connect Google Search Console to verify your site ownership
- Follow the on-screen prompts to complete ownership verification
Step 4: Connect Google AdSense
- Once Search Console is verified, navigate to Site Kit → Settings → Connect More Services
- Click “Connect” next to Google AdSense
- Sign in to your AdSense account and grant access
- Site Kit will automatically insert your AdSense Auto Ads code across your entire site
Step 5: Enable Auto Ads
- In your Google AdSense dashboard, go to Ads → By Site
- Toggle Auto Ads ON for your domain
- Configure Auto Ad formats—enable In-page ads, Anchor ads, and Vignette ads for maximum coverage
Step 6: Verify Ad Display
- Wait 20–30 minutes for ads to begin appearing
- Visit your site in an incognito browser window to confirm ads are displaying correctly
- Total Setup Time: Approximately 10–15 minutes
Method 2: Using the Advanced Ads Plugin
(Most Flexible — Recommended for All Publishers)
This method gives you complete control over exactly where, when, and to whom your ads are displayed. It is the recommended approach for any publisher serious about maximizing AdSense revenue.
Step 1: Install Advanced Ads
- Go to WordPress Dashboard → Plugins → Add New
- Search for “Advanced Ads”
- Click Install Now, then Activate
Step 2: Run the Setup Wizard
- After activation, Advanced Ads will prompt you with a setup wizard
- Select “Google AdSense” as your primary ad network
- Click “Connect AdSense” and sign in to your Google account
- Grant Advanced Ads permission to access your AdSense account
Step 3: Create Your First Ad Unit
- Navigate to Advanced Ads → Ads → New Ad
- Enter an Ad Name (e.g., “In-Content Ad — After Paragraph 2”)
- Select “Google AdSense” as the ad type
- Choose your AdSense ad unit from the dropdown — or create a new one directly from the interface
Step 4: Configure Ad Display Conditions
- Under “Visitor Conditions” — Choose who sees the ad (e.g., all visitors, logged-out users only, mobile users only)
- Under “Display Conditions” — Choose where the ad appears (e.g., all posts, specific categories, specific post IDs)
- Under “Placement” — Select the exact position:
- Before/After content
- After a specific paragraph number
- Sidebar widget
- Header or footer
Step 5: Save and Publish the Ad
- Click “Publish” to make the ad live
- Visit your site in an incognito browser to verify the ad is displaying in the correct position
Step 6: Add More Ad Units
- Repeat Steps 3–5 for each additional ad unit
- For best results, create separate ad units for:
- Above the fold (header banner)
- In-content (after paragraph 1 or 2)
- Sidebar sticky ad
- Below post content⏱ Total Setup Time: Approximately 20–30 minutes for a full multi-placement setup
Method 3: Manually via WPCode (Safest Code-Based Method)
This method is ideal if you want to add your AdSense Auto Ads code site-wide without modifying your theme files—protecting your ad setup from being lost during theme updates.
Step 1: Get Your AdSense Auto Ads Code
- Log in to your Google AdSense dashboard
- Navigate to Ads → By Site → Get Code
- Copy the entire Auto Ads JavaScript snippet
Step 2: Install WPCode
- Go to WordPress Dashboard → Plugins → Add New
- Search for “WPCode”
- Click Install Now, then Activate
Step 3: Add Your AdSense Code
- Navigate to WPCode → Header & Footer in your WordPress dashboard
- Paste your AdSense Auto Ads code into the “Header” field
- Click “Save Changes”
Step 4: Verify Site-Wide Insertion
- WPCode automatically inserts the code into the
<head>section of every page on your site - Visit your site in an incognito browser and use Ctrl+U to view page source
- Confirm that your AdSense code appears within the
<head>tags
Step 5 (Optional): Add Specific Ad Unit Codes
- For manually placed ad units in specific locations, go to WPCode → Snippets → Add New
- Paste your individual AdSense ad unit code
- Set conditional logic to display it only on specific pages or post types
- Use the provided shortcode to embed the ad directly inside any post or page
- Total Setup Time: Approximately 5–10 minutes
Method Comparison — Which One Is Right for You?
| Feature | Google Site Kit | Advanced Ads | WPCode |
|---|---|---|---|
| Difficulty Level | ⭐ Beginner | ⭐⭐⭐ Intermediate | ⭐⭐ Easy |
| Ad Placement Control | Auto only | Full manual + Auto | Manual code only |
| A/B Testing | ❌ | ✅ (Pro) | ❌ |
| Targeting Options | ❌ | ✅ Advanced | ✅ Basic |
| Analytics Integration | ✅ Full Google suite | ✅ Basic | ❌ |
| Theme-File Safe | ✅ | ✅ | ✅ |
| Best For | Beginners | All publishers | Code-savvy users |
| Cost | Free | Free + Paid | Free + Paid |
Common Mistakes to Avoid When Adding AdSense to WordPress
- Placing ads inside the theme’s header.php file — Always use WPCode or Site Kit instead; theme updates will wipe your ad code
- Showing ads on thin or low-content pages — Use Advanced Ads’ conditional targeting to exclude pages with fewer than 300 words
- Exceeding Google’s ad density guidelines — In 2026, Google limits ads to a reasonable proportion relative to content length
- Not testing in incognito mode — Your browser may cache old page versions; always verify in a fresh incognito window
- Ignoring mobile ad display — Always check how ads render on mobile devices; use WP QUADS or Advanced Ads responsive settings
- Skipping click fraud protection — Always install AICP alongside your AdSense plugin to protect your account
🔗 Related Read: Once your ads are live, learn how to identify your most profitable content topics in our guide on High CPC Keywords 2026 to strategically grow your AdSense RPM.
Best Ad Placement Positions for Maximum CTR
Getting your Google AdSense ad placement strategy right is one of the single most impactful things you can do to increase your AdSense revenue in 2026.
Even with the best plugin installed, poorly positioned ads will generate low CTR and weak RPM. Below are the proven ad placement positions that consistently deliver the highest performance for WordPress bloggers.

1. Above the Fold:
This is a high-visibility banner. Above the fold refers to any ad placement that is visible to the user immediately upon landing on your page, without scrolling. This is historically one of the highest-impression ad positions on any website.
Best Practices:
- Use a 728×90 leaderboard banner on desktop or a 320×100 large mobile banner on mobile
- Place it directly below your site header or navigation menu
- Avoid making it the very first element on the page—Google penalises sites where ads dominate the top viewport
- Combine with a sticky header ad for continuous visibility as users scroll
Expected Performance: High impressions, moderate CTR — best for CPM-based revenue
2. In-Content Ads:
After the First or Second Paragraph (Highest CTR Position)
In-content ad placement—specifically after the first or second paragraph of your blog post is consistently rated as the #1 highest CTR position for AdSense publishers worldwide. At this point, the reader is engaged with your content, and their eyes naturally flow into the ad unit.
Best Practices:
- Use a responsive ad unit, so Google automatically serves the best-performing size
- Insert after paragraph 1 or 2 for maximum engagement use Advanced Ads or Ad Inserter Pro to automate this
- Use in-article ad format from AdSense for a native, content-matching appearance
- Avoid placing two in-content ads within close proximity maintain at least 4–5 paragraphs between ad units
Expected Performance: Highest CTR — best for CPC-based revenue
💡 Pro Tip: Use Advanced Ads’ paragraph targeting feature to automatically insert ads after a specific paragraph across all your posts — no manual editing required.
3. Sidebar Sticky Ads
Consistent Visibility on Long Posts
Sidebar sticky ads remain in the user’s viewport as they scroll down a long blog post, providing continuous ad exposure throughout the entire reading session. For desktop traffic, this is one of the most reliable revenue-generating positions.
Best Practices:
- Use a 300×250 medium rectangle or 160×600 wide skyscraper format
- Enable sticky/fixed positioning using Advanced Ads Pro’s sticky ad add-on
- Ensure the ad does not overlap with content on smaller laptop screens
- Set a top and bottom offset so the ad stays within the content area and never covers navigation or footer elements
Expected Performance: High impressions, steady CTR — excellent for long-form content pages
4. Before/After Post Content
These are natural pause points of the advertising in your blog. Ads placed immediately before the post begins or just after the post content ends capitalize on natural reader pause points—moments where attention is transitioning and the reader is most receptive to adjacent content.
Best Practices:
- Before content: Use a 728×90 or responsive unit just above the post title area or directly below it
- After content: This is often called the “end of article” position—one of the best spots for high-intent clicks, as the reader has just finished consuming your content
- Pair the after-content ad with a related posts widget to keep bounce rate low while still generating ad revenue
- Use Advanced Ads or WP QUADS to automate insertion at these positions without manual shortcodes
Expected Performance: Strong CTR — especially the after-content position for engaged readers
5. In-Feed Ads
These types of ads are homepage & category page (magazine blog) ads. For blogs with a magazine-style layout or grid-based homepage, in-feed ads inserted between post listings are highly effective. These native-style ads blend seamlessly with your editorial content, making them significantly less intrusive than banner ads.
Best Practices:
- Insert an in-feed ad after every 4th or 6th post in your listing grid
- Use Google’s native in-feed ad format through AdSense for maximum content-matching relevance
- Use the In-Feed Ads for Google AdSense plugin for automated insertion into WordPress post loops
- Ensure ad styling matches your theme’s postcard design—font, border radius, and spacing should feel consistent
Expected Performance: High CTR on archive pages — particularly effective for news, lifestyle, and multi-category blogs
6. Anchor Ads (Auto Ads) — Mobile Revenue Booster
Anchor ads are the biggest mobile revenue booster. These are a type of Google auto ad that stick to the bottom of the mobile screen as users scroll. In 2026, with mobile traffic dominating most WordPress blogs, anchor ads have become one of the highest-revenue Auto Ad formats available.
Best Practices:
- Enable Anchor Ads via Google Auto Ads in your AdSense dashboard
- Use Google Site Kit or Advanced Ads to deploy Auto Ads site-wide with one click
- Monitor the anchor ad CTR separately in your AdSense dashboard and adjust frequency if the bounce rate increases
- Consider disabling anchor ads on landing pages or sales pages where conversions matter more than ad clicks
Expected Performance: Strong mobile CTR — excellent for sites with 60%+ mobile traffic
7. Between Comments
These are the engaged Audience Targeting places. Placing an ad unit between the comments section of a blog post targets your most engaged readers — those who have read the entire post and are actively participating in the discussion. This is an often-overlooked but high-performing placement.
Best Practices:
- Use Ad Inserter Pro to automatically inject an ad unit before or after the comments section
- Use a 336×280 large rectangle or responsive unit for best visibility
- Limit to one ad unit in the comments area to avoid policy violations
Expected Performance: Moderate impressions, above-average CTR due to high reader engagement level
🔗 Related Read: To maximize the revenue potential of your best ad positions, target high-value content topics. Check out our guide on High CPC Keywords 2026 to identify the most profitable niches for AdSense publishers.
Ad Placement Strategy Summary
| Position | Best Ad Format | Best For | CTR Potential |
|---|---|---|---|
| Above the fold | 728×90 Leaderboard | All blogs | ⭐⭐⭐ |
| After paragraph 1–2 | Responsive / In-article | All blogs | ⭐⭐⭐⭐⭐ |
| Sidebar sticky | 300×250 Rectangle | Desktop-heavy blogs | ⭐⭐⭐⭐ |
| Before/After content | Responsive | Long-form content | ⭐⭐⭐⭐ |
| In-feed | Native in-feed | Magazine/news blogs | ⭐⭐⭐⭐ |
| Anchor ads | Auto Ads anchor | Mobile-heavy blogs | ⭐⭐⭐⭐ |
| Between comments | 336×280 Rectangle | High-engagement blogs | ⭐⭐⭐ |
What to Avoid — Ad Placement Mistakes That Hurt Revenue
- Placing ads too close to navigation buttons — Google’s Better Ads Standards explicitly prohibit this
- Stacking multiple ads at the top of the page — Violates Google’s ad density policy and harms user experience
- Using pop-up or interstitial ads without meeting Google’s guidelines — Risks policy violation
- Hiding ads or disguising them as content without a visible “Advertisement” label — Direct AdSense policy violation
- Ignoring mobile ad rendering — Always preview every ad position on a mobile device before publishing
- Running too many ad units on short posts — Google’s 2026 ad density guidelines recommend that ads should never exceed the amount of content on the page
🔗 Also Read: If your AdSense earnings have plateaued, explore our list of 15 Best AdSense Alternatives for Bloggers in 2026 — some of which offer significantly higher RPMs for specific niches.
You can read my detailed Medium guide on this topic here: 9 Practical Tips to Increase Your AdSense Revenue in 2026.
Google AdSense Auto Ads — Should You Use It?
Google AdSense Auto Ads is one of the most significant developments in publisher monetization of the last few years. Powered by Google’s machine learning technology, Auto Ads automatically analyze your page layout, content structure, and existing ad placements—then intelligently decide where, when, and how many ads to display for maximum revenue without degrading user experience.
But the big question every WordPress blogger asks is, “Should you rely on Auto Ads, use manual placements, or combine both?” Here is everything you need to know to make the right decision for your blog in 2026.
How Google AdSense Auto Ads Work
When you enable Auto Ads, Google places a single JavaScript snippet in the <head> section of your website. From that point, Google’s AI takes over and handles the entire ad placement process automatically.
Here is what happens behind the scenes:
- Page Analysis — Google’s algorithm scans each page on your site, analysing the layout, content length, existing ad units, and available white space
- Format Selection — The AI selects the most appropriate ad formats for each page from the available Auto Ad types
- Placement Decision — Google identifies the optimal positions on each page where ads are most likely to generate clicks without disrupting the reading experience
- Continuous Optimisation — The algorithm continuously learns from user behaviour on your site and refines placements over time to improve revenue performance
- Revenue Maximisation — Google adjusts ad density dynamically — showing more ads on longer, content-rich pages and fewer on shorter ones
Auto Ads Formats Available in 2026
Google Auto Ads currently supports the following ad formats, all of which can be individually toggled on or off:
| Format | Description | Best For |
|---|---|---|
| In-page Ads | Standard ads placed within page content | All blog types |
| Anchor Ads | Sticky ads fixed to the bottom of the screen | Mobile-heavy sites |
| Vignette Ads | Full-screen interstitial ads shown between page loads | High page-view sites |
| In-article Ads | Native-style ads placed between paragraphs | Long-form content |
| Multiplex Ads | Grid-style content recommendation ads | Magazine/news blogs |
| Side Rail Ads | Full-screen interstitial ads are shown between page loads | Ads are placed in the left and right margins |
Pros of Using Google Auto Ads
- Zero manual configuration — One code snippet handles everything; ideal for bloggers who want a hands-off monetisation setup
- AI-powered placement optimisation — Google’s algorithm is trained on billions of data points and often identifies high-performing placements that manual testing would miss
- Dynamic ad density — Automatically adjusts the number of ads based on page length and content richness, reducing the risk of over-monetisation
- Continuous self-improvement — Unlike manual placements that remain static, Auto Ads actively learn and optimise based on real user behaviour on your specific site
- Multi-format coverage — Simultaneously deploys multiple ad formats (anchor, vignette, in-article) without any additional configuration
- Faster implementation — Particularly useful when launching a new blog or adding new post templates, where manual placement testing would take weeks
Cons of Using Google Auto Ads
- Limited publisher control — You cannot specify exact ad positions, which means Google may place ads in locations you find aesthetically undesirable
- Risk of over-monetisation — On content-heavy pages, Auto Ads can sometimes insert more ad units than ideal, potentially increasing bounce rate
- CLS (Cumulative Layout Shift) issues — Auto Ads can cause unexpected layout shifts as ads load dynamically, which negatively impacts your Core Web Vitals score and search rankings
- Inconsistent placement across page types — Auto Ads may perform well on long blog posts but poorly on short pages, category archives, or landing pages
- Less data transparency — You cannot easily identify which specific Auto Ad placements are driving the most revenue without an advanced analytics setup
- Not suitable for all page types — Auto Ads should be disabled on checkout pages, opt-in landing pages, and membership areas where ad clicks work against conversions
Manual Ad Placement vs. Auto Ads — Which Performs Better?
This is the most debated question among AdSense publishers. The honest answer is: it depends on your blog’s maturity and traffic volume.
| Factor | Auto Ads | Manual Placement |
|---|---|---|
| Setup Time | ⚡ Minutes | 🕐 Hours of testing |
| Control | ❌ Limited | ✅ Full control |
| Optimisation | ✅ AI-driven | ✅ Data-driven (manual) |
| Best for Beginners | ✅ Yes | ❌ Learning curve |
| Best for Revenue | ✅ Good starting point | ✅ Better long-term |
| Core Web Vitals Impact | ⚠️ Can cause CLS issues | ✅ More predictable |
| Page-Specific Control | ❌ Limited exclusions | ✅ Granular targeting |
| A/B Testing | ❌ Not available | ✅ Available via Advanced Ads |
The Best Strategy for 2026 — Combine Both
The most effective approach for WordPress publishers in 2026 is not to choose one over the other, but to strategically combine Auto Ads with manually placed ad units for comprehensive coverage.
Here is the recommended hybrid strategy:
Step 1: Enable Auto Ads as Your Foundation
- Deploy the Auto Ads site-wide using Google Site Kit or Advanced Ads for baseline coverage
- Enable Anchor Ads and Vignette Ads for strong mobile revenue
- Enable In-article Ads for automatic in-content placements on longer posts
Step 2: Add High-Priority Manual Placements
- Use Advanced Ads to manually place high-CTR units in your top-performing positions:
- After paragraph 1–2 (in-content)
- Sidebar sticky (desktop)
- After post content (end-of-article)
- Manual placements take priority over Auto Ads positions, preventing Google from placing Auto Ads in your best-performing spots
Step 3: Exclude Key Pages from Auto Ads
- Disable Auto Ads on:
- Landing pages and opt-in pages
- Contact and About pages
- Checkout and membership pages
- Any page where user action matters more than ad clicks
- Use Advanced Ads’ exclusion rules or the Auto Ads page exclusion tool in your AdSense dashboard
Step 4: Monitor and Refine
- Use MonsterInsights to track page-level AdSense revenue
- Identify pages where Auto Ads are causing high bounce rates or CLS issues
- Gradually replace underperforming Auto Ad positions with tested manual units
How to Enable and Configure Auto Ads on WordPress
Via Google Site Kit:
- Go to Site Kit → Settings → AdSense
- Toggle “Enable Auto Ads” to ON
- Auto Ads will be immediately active across your entire site
Via Advanced Ads:
- Go to Advanced Ads → Settings → AdSense
- Connect your AdSense account
- Under “Auto Ads”, toggle the feature ON
- Use the page-level exclusion rules to disable Auto Ads on specific post types or pages
Via WPCode (Manual Code Method):
- Copy your Auto Ads code from AdSense Dashboard → Ads → Get Code
- Paste it into WPCode → Header & Footer → Header section
- Use WPCode’s conditional logic to exclude specific pages
Auto Ads — Verdict for 2026
- Use Auto Ads if you are a new blogger, have limited time for manual testing, or want a low-maintenance monetisation setup that works out of the box.
- Use Manual Placements if you have an established blog with consistent traffic and want granular control over every ad position for maximum revenue optimisation.
Best Strategy: Deploy Auto Ads for broad coverage, then layer in manual placements using Advanced Ads for your highest-traffic posts and pages. This hybrid approach consistently outperforms either method used in isolation.
🔗 Related Read: If Auto Ads are not delivering the RPM you expected, it may be time to supplement with higher-paying networks. Explore our guide on 15 Best AdSense Alternatives for Bloggers in 2026 for options that can significantly boost your overall ad revenue.
Frequently Asked Questions (FAQ) on the Best WordPress Advertising Plugins
What is the best Google AdSense plugin for WordPress in 2026?
Advanced Ads is the best Google AdSense plugin for WordPress in 2026. It offers unlimited ad units, advanced targeting, lazy loading, A/B testing, and Auto Ads support — all in one plugin. The free version is powerful enough for most bloggers, while the Pro version unlocks advanced revenue optimisation features starting at $49/year.
Can I use Google AdSense on WordPress for free?
Yes, you can use Google AdSense on WordPress completely free. Plugins like Google Site Kit, Advanced Ads (free version), WP QUADS, and WPCode allow you to add and manage AdSense ads without any cost. Google AdSense itself is also free to join — you only need an approved AdSense account and a live WordPress website.
How do I add Google AdSense to my WordPress site without coding?
You can add Google AdSense to WordPress without coding using Google Site Kit — Google’s official free plugin. Simply install it, connect your AdSense account through the guided setup wizard, and Auto Ads will be automatically activated across your entire site within minutes. No theme file editing or technical knowledge is required.
How many AdSense ads can I display per page on WordPress?
Google does not set a fixed limit on the number of ads per page, but its ad density policy requires that ads never exceed the amount of content on the page. As a best practice, limit ads to 3–4 units per post for standard blog content. For long-form posts over 2,000 words, up to 5–6 strategically placed units are acceptable.
What is the best ad placement position for maximum AdSense CTR?
The in-content position after the first or second paragraph consistently delivers the highest CTR for AdSense publishers. At this point, readers are engaged with your content, and their eyes naturally flow into the ad unit. Use Advanced Ads or Ad Inserter Pro to automatically insert ads after a specific paragraph across all your WordPress posts.
Does installing an AdSense plugin slow down my WordPress site?
Most lightweight AdSense plugins like WP QUADS, AICP, and WPCode have minimal impact on page speed. However, heavier plugins like MonsterInsights load additional scripts that can affect load time. To offset this, enable lazy loading for ads in Advanced Ads and use a caching plugin like WP Rocket to maintain strong Core Web Vitals scores.
What are Google AdSense Auto Ads, and should I use them on WordPress?
Google AdSense Auto Ads uses AI to automatically identify the best ad placements on your pages without manual configuration. It is ideal for beginners who want a hands-off setup. However, for maximum revenue control, the best strategy in 2026 is to combine Auto Ads with manually placed units using Advanced Ads for a comprehensive hybrid monetization setup.
How do I protect my AdSense account from invalid clicks on WordPress?
Install the Ad Invalid Click Protector (AICP) plugin — a free WordPress plugin that monitors suspicious click patterns and automatically blocks offending IP addresses. Configure it to block any IP that clicks your ads more than 2–3 times within 24 hours. Enable email alerts to be notified instantly of any unusual click activity on your site.
Can I use AdSense and other ad networks together on WordPress?
Yes, you can run Google AdSense alongside other ad networks on WordPress. Plugins like AdRotate and Advanced Ads support multiple ad networks simultaneously — including Media.net, Amazon Associates, and Google Ad Manager. Use AdSense as your primary network and set up alternative networks as fallback ads for unsold inventory to maximize your overall ad revenue.
What is the difference between Advanced Ads and Google Site Kit for AdSense?
Google Site Kit is Google’s official plugin designed for beginners — it connects AdSense, Analytics, and Search Console in one dashboard with automatic Auto Ads deployment but limited manual control. Advanced Ads is a dedicated ad management plugin offering granular placement targeting, A/B testing, lazy loading, and multi-network support—making it the superior choice for serious publishers focused on revenue optimization.
Final words on WordPress ad management plugins 2026
Managing Google AdSense on WordPress effectively in 2026 requires more than simply pasting an ad code into your site. The right combination of plugins—from placement and management to fraud protection and performance tracking—can make a measurable difference to your monthly AdSense earnings.
To summarize the best choices by use case:
- Best All-Round Plugin: Advanced Ads — for complete ad management flexibility
- Best for Beginners: Google Site Kit — for a zero-configuration Auto Ads setup
- Best for Account Safety: AICP — essential for every AdSense publisher
- Best for Revenue Tracking: MonsterInsights — for page-level AdSense performance data
- Best for Page Speed: WP QUADS — for lightweight, responsive ad delivery
Start with Advanced Ads + AICP + MonsterInsights as your core stack, layer in Google Auto Ads for broad coverage, and continuously optimize using A/B testing and page-level revenue data. This is the most complete and future-proof AdSense management setup available for WordPress publishers in 2026.
🔗 Next Step: If your AdSense application is still pending, read our complete guide on How to Get Google AdSense Approval Fast — and once approved, come back to this guide to set up your perfect WordPress AdSense plugin stack.
💬 Found this guide helpful? Which AdSense plugin are you currently using on your WordPress blog? Share your experience in the comments below — we would love to hear what is working best for you in 2026!