How to Start a WordPress Blog on GreenGeeks in 2026? (Complete Guide)
New registrants at GreenGeeks receive a complimentary domain for one year. It is advisable to buy your desired domain name with the extension of your preference. Nonetheless, I highly suggest purchasing a domain with the .com extension exclusively. Otherwise, explore additional alternatives.
Gone are the days when creating a blog took days or months of coding. Now, with user-friendly hosts like GreenGeeks, anyone can launch a WordPress site in just minutes, regardless of technical skill.
In this guide, I’ll walk through how to start a WordPress blog on GreenGeeks hosting in a few quick steps. I’ll also highlight some of the key benefits that make GreenGeeks an ideal hosting choice for new bloggers in 2026.
With GreenGeeks’ fast and reliable servers, robust security protections, and top-notch WordPress support, you can create an eco-friendly blogging site that loads in seconds and can handle substantial traffic growth.
Their affordable plans start at just $2.49/month, providing immense value. With their intuitive dashboard and 1-click WordPress installer, you don’t need any prior webmaster experience to get up and running.
By the end of this guide, you’ll have the knowledge to launch a new WordPress blog with GreenGeeks hosting. Let’s dive in and get your eco-friendly blogging site live on a fast, secure, and sustainable web host built for WordPress success.
Why GreenGeeks?
Our favorite type of story is a fantastic origin story, and GreenGeeks has one that’s just as great as any. Trey Gardner, an American businessman, was fascinated to see how much energy the web hosting sector uses annually.
It was even anticipated that, by 2026, the web hosting business’s carbon footprint would be equal to that of the airline industry!
GreenGeeks strives to become the world’s most environmentally friendly web host.
GreekGeeks has thus far hosted over 500,000 websites. For the past four years, they have made the INC 5000 list of the fastest-growing companies in America, so we presume they are doing something well. But what exactly is it?
Today, we’re going to look at what we appreciate about GreenGeeks, as well as where they might fall short. Would you say they’re a suitable host for your website? Let’s have a look.
Key Features and Benefits of GreenGeeks Hosting
GreenGeeks stands out as an eco-friendly hosting provider. Their renewable energy usage isn’t just carbon-neutral; it’s carbon-reducing, offsetting three times more energy than they consume. This makes GreenGeeks an excellent, environmentally sustainable option.
- Blazing Fast Performance: GreenGeeks excels when it comes to speed, with consistently fast page load times regardless of visitor location. They optimize servers and provide built-in caching like PowerCacher to accelerate websites even further.
- Unlimited Resources and Freebies: GreenGeeks shared hosting plans offer tremendous value with unlimited bandwidth, SSD storage, databases, and more. They also include free website migration, daily backups, and other perks, ideal for existing sites upgrading hosts.
- Outstanding Support: GreenGeeks provides 24/7 customer support via live chat, email, and phone. Their knowledgeable support team is quick to respond and resolve any technical issues thoroughly.
In summary, GreenGeeks combines eco-friendly hosting, reliable speed, generous free features, and excellent around-the-clock support. Green web hosting, with its powerful performance and resources, is a top choice to consider. Here is my opinion as GreenGeeks review 2026 to learn more.
What are the pricing and plans of GreenGeeks?
GreenGeeks offers a variety of shared hosting and WordPress hosting plans.
As I mentioned previously, we will discuss shared hosting plans only since they are the most cost-effective option for newbies. So, according to GreenGeeks hosting plans, they provide three types of hosting with various pricing options.
- Ecosite Lite is perfect for newly launched small websites or blogs.
- Ecosite is especially well-suited for websites that require greater performance and resources.
- Ecosite Premium: This is a small business plan perfect for active websites and online stores.
So, the best plan to start with GreenGeeks is to choose the ECO Lite plan for 36 months because you can take advantage of $2.95 per month. You can also avail of the cheapest GreenGeeks coupon discount and a free domain name through our provided links.
How to Start a WordPress Blog on GreenGeeks?
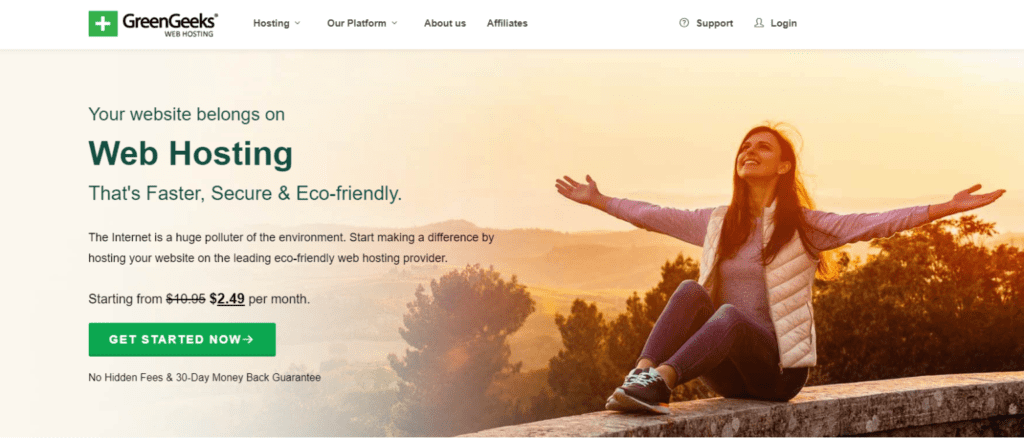
STEP 1: Choose the Perfect Plan
| Pricing | Ecosite Lite | Ecosite | Ecosite Premium |
| Usual Monthly Plan | $9.95 | $14.95 | $24.95 |
| 1 Year Plan | $4.95 | $7.95 | $13.95 |
| 2 Year Plan | $3.95 | $6.95 | $12.95 |
| 36-Month Plan | $2.49 | $5.95 | $11.95 |
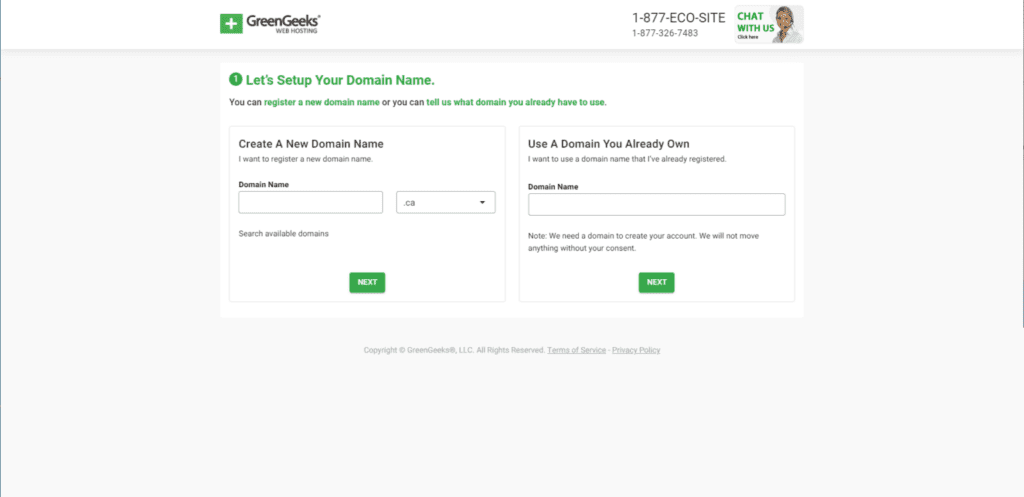
STEP 2: Grab the Free domain name
GreenGeeks gives new registrants a free domain for a year. It is preferred that you purchase your selected domain name along with an extension of your choice. However, I always recommend purchasing a domain name with the.com extension solely. Otherwise, search for further alternatives.
STEP 3: Fill the personal information
To complete your order, you must submit all of your personal information, such as your name, email address, and mobile number. This information will be passed on to GreenGeeks to process your order once you’ve purchased hosting from them.

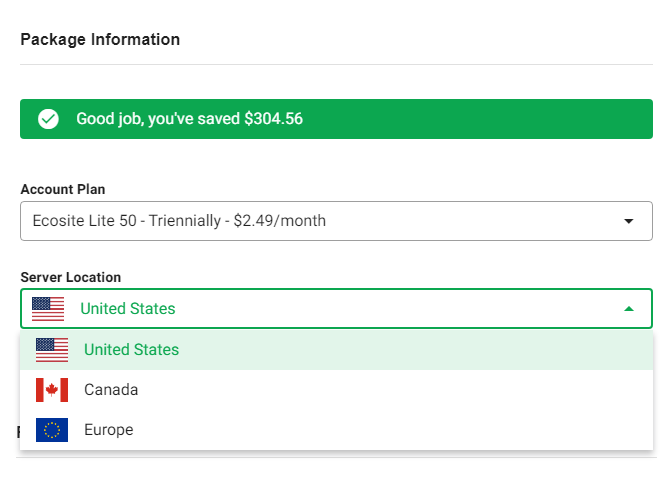
STEP 4: Choose the Greengeeks data center
There are three GreenGeeks data centers; two are in the US and another is in Europe. So, based on the website traffic, the user can select the appropriate data center. For instance, if you intend to receive traffic from the US, ensure that you have selected a US data center. It helps with the fast loading of your website in the US. You may also choose a nearby data center and activate the free CDN service.
STEP 5: Complete the Payment process
Unfortunately, GreenGeeks only accepts credit cards. As a result, make sure you enter your credit card information and complete the payment. You will also be entitled to a 30-day money-back guarantee.

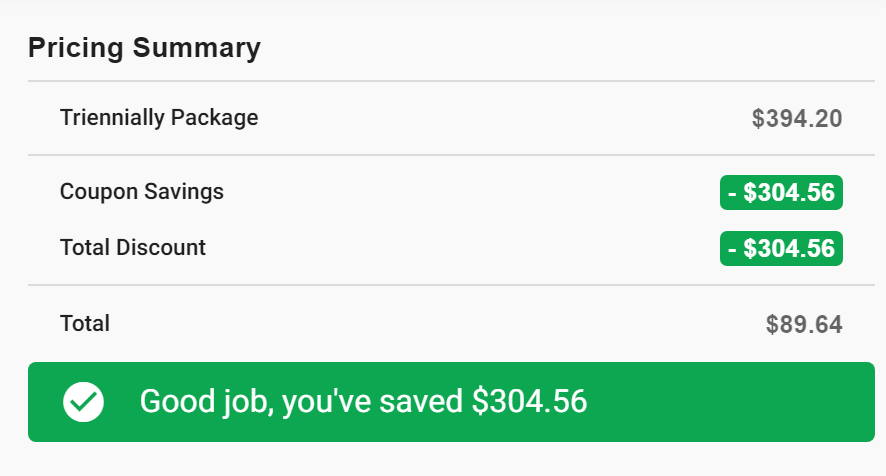
The final cart, including the discount applied, will look like this:. This plan allows you to save lots of money because of the 36-month subscription. See how much you’ll pay per year with this GreenGeeks offer.
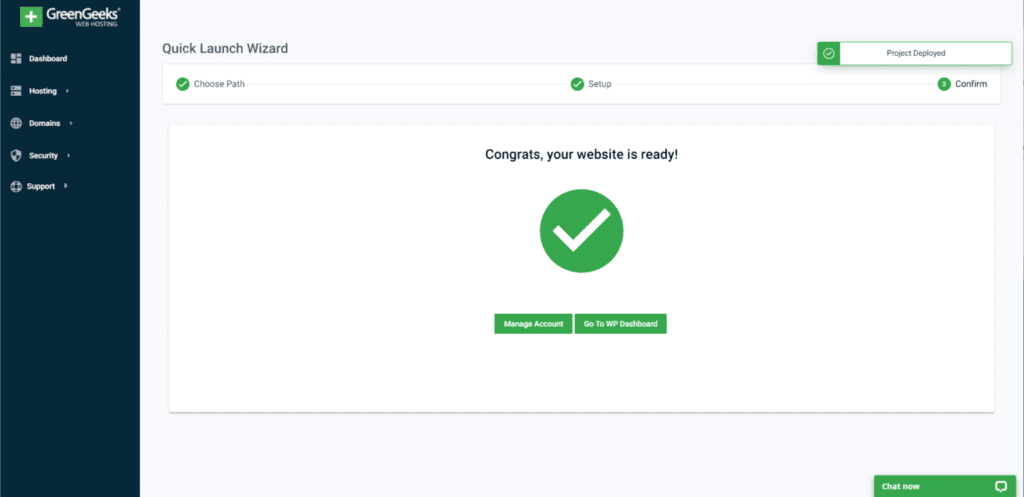
Create a Blog with Quick Launch Wizard
a. Start Quick Launch Wizard
Get the quick launch wizard to set up your website for you, and you’ll be on your way to creating your website fast.
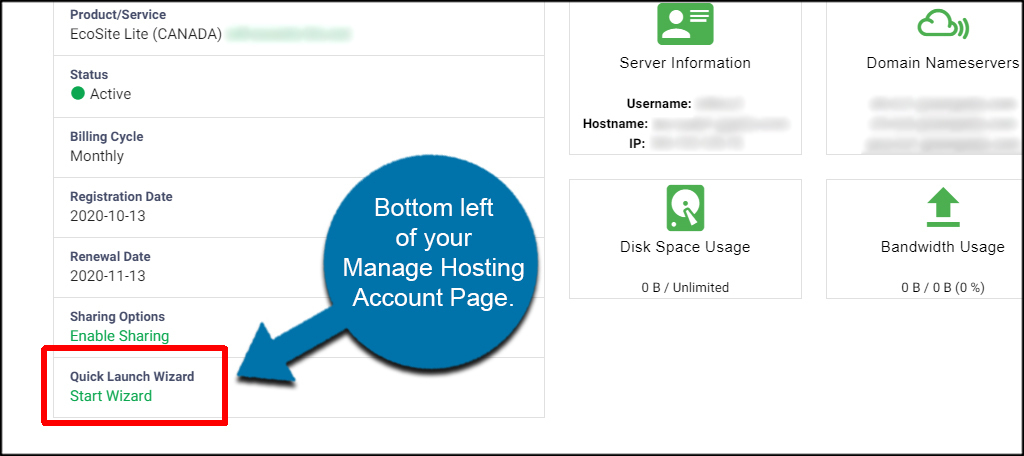
The Quick Launch Wizard Tool from Greengeeks is a very powerful tool that will help you to create a WordPress blog in seconds.
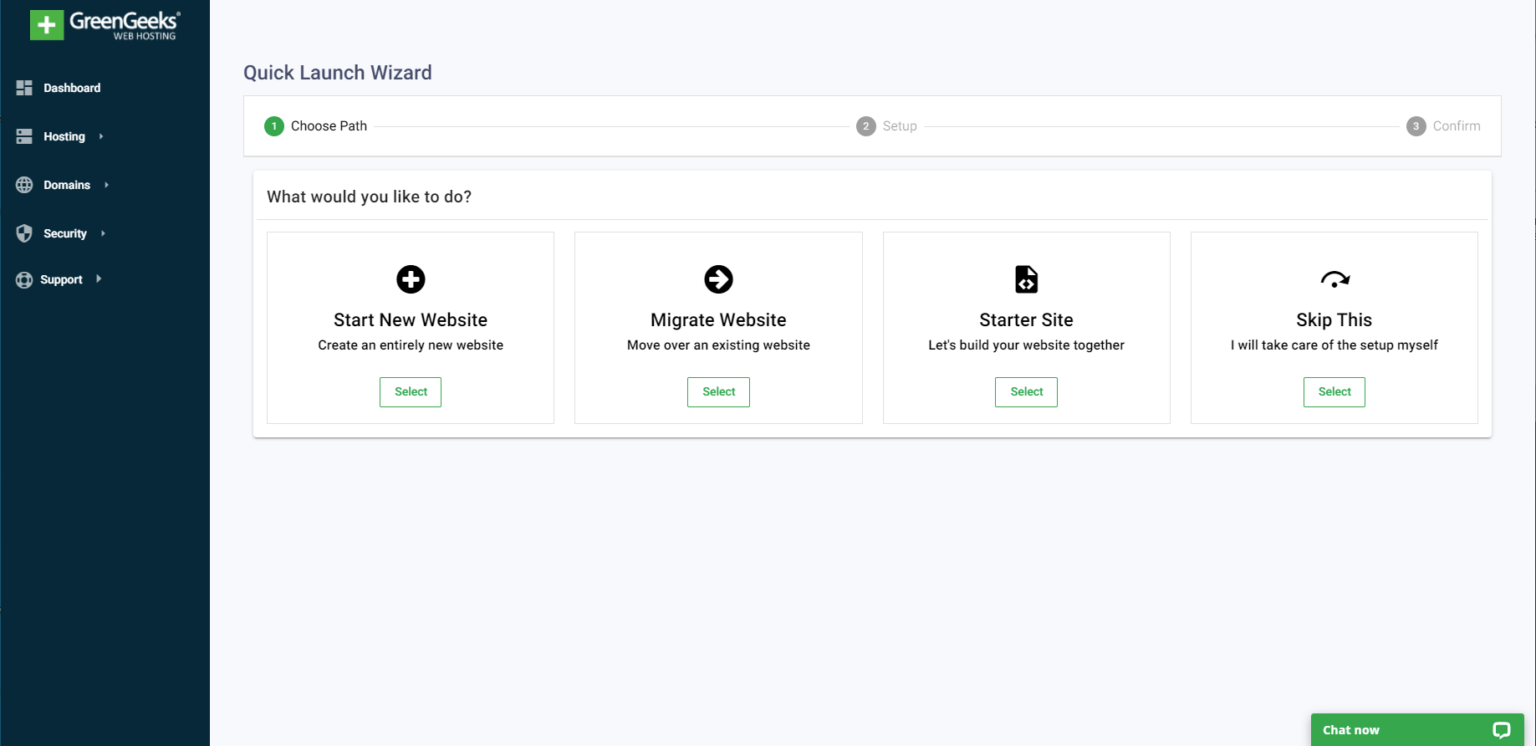
b. Start new website
To begin a new website, click Start. Also, migrating your website to Greengeeks is completely free of charge.
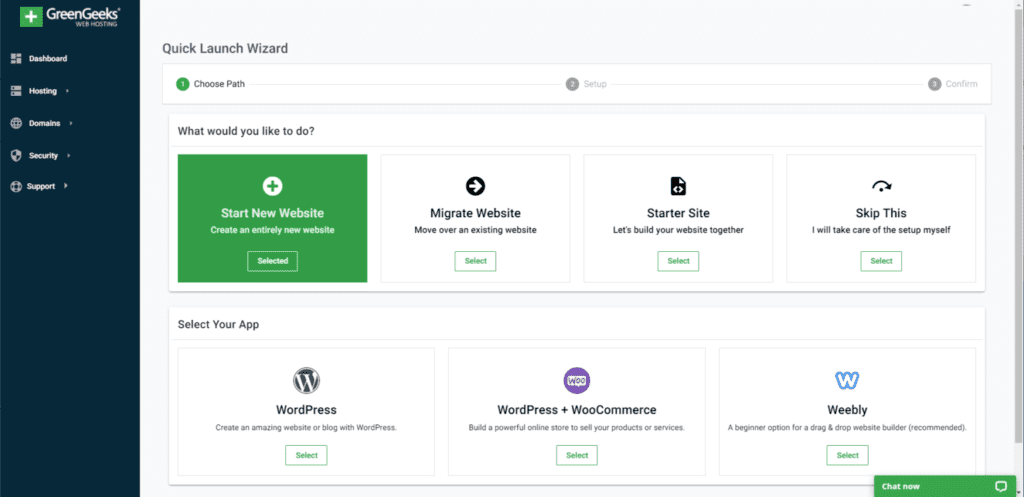
c. Select your choice of apps
As the most popular and commonly used CMS, WordPress should be your choice. Choose WordPress from the “Select Your App” section.

d. Migrate Website: to transfer existing website
Since your GreenGeeks hosting account is active now, you can take advantage of the complimentary “Website Migration” service from the Quick Launch Wizard Tool.
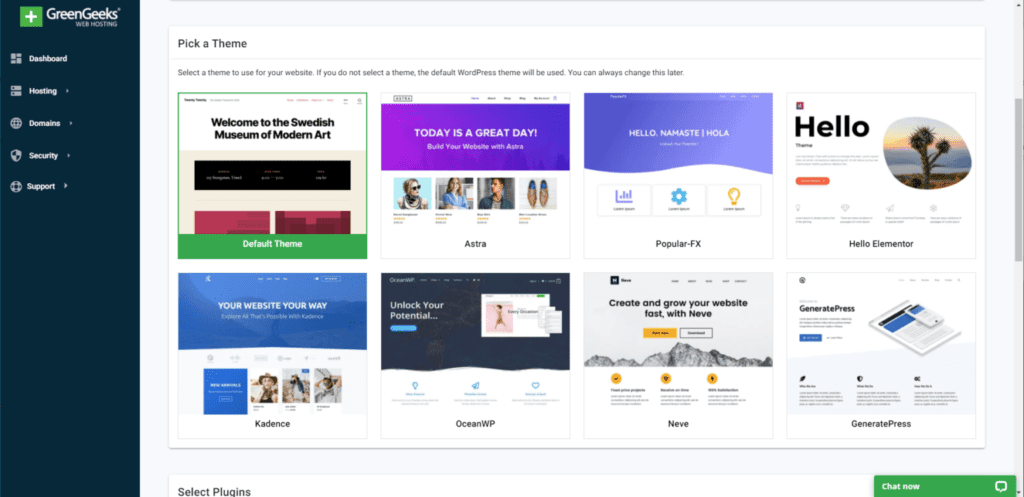
e. Starter Site: Choose suitable theme
In blogging, the theme is quite important, since it determines the speed and design of your website. Pick an appropriate theme, given your needs. I strongly recommend the Kadence theme (or GeneratePress theme) based on your needs.
f. Home page section
To use a theme to customize the appearance of the home page of your WordPress site, click the “Appearance” option on the left. By default, this is on the theme page. Hover your cursor over the theme you’d like to modify and click the “Activate” button.

g. About Us section
The About Us page acts as a means to define the kinds of services and products offered by the site. You can create an interactive About US section using GreenGeek’s in-built free website builder.
h. Product services
This product and marketing material your website uses, as well as how your website contributes to the overall marketing strategy. Using GreenGeeks’ unified website builder to quickly create multiple product and service pages.
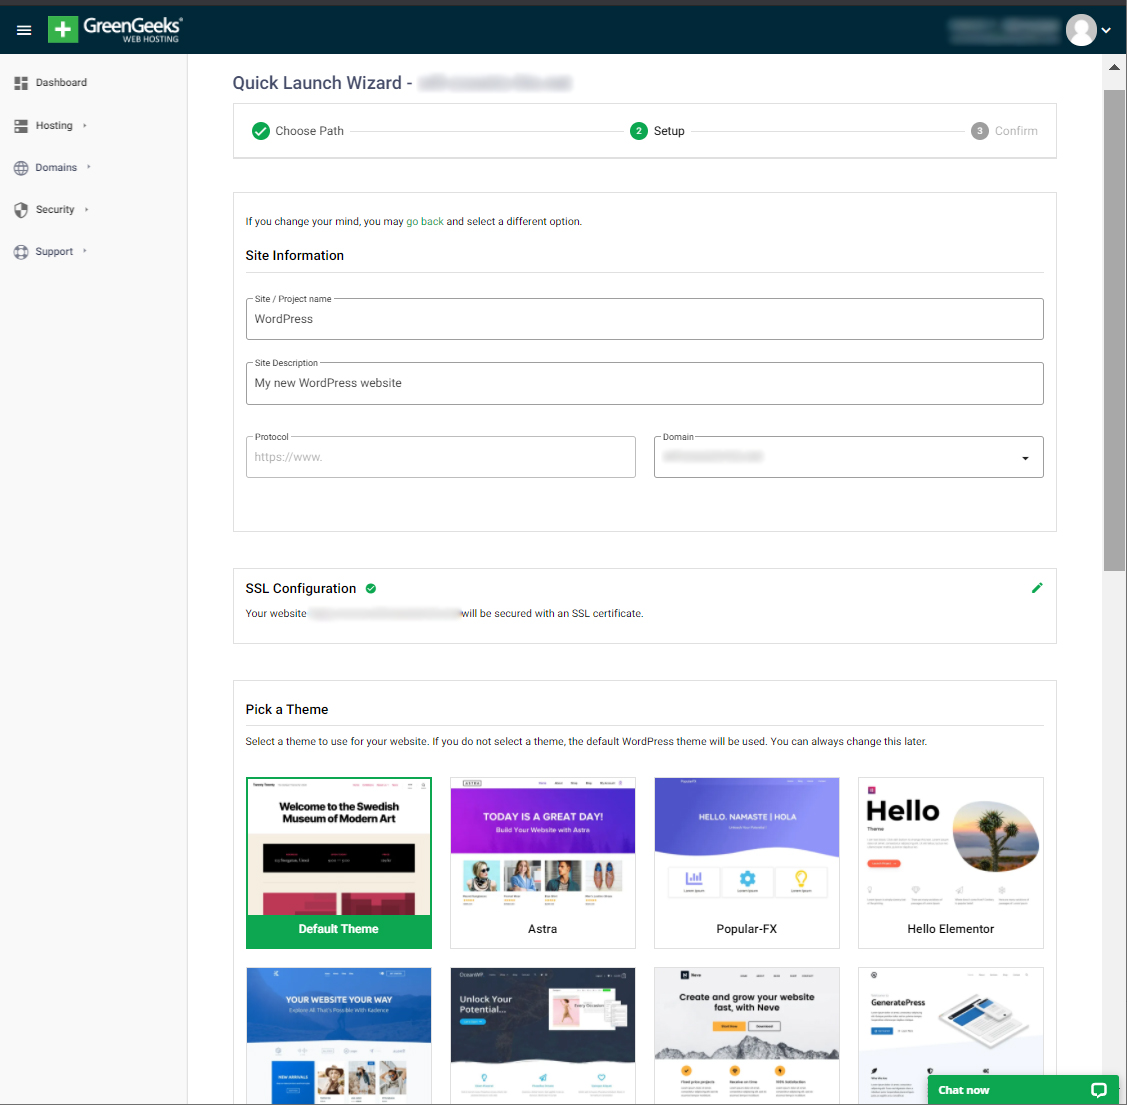
i. Start Setup: Site Information
The Quick Launch Wizard is exclusive to GreenGeeks. It is designed to get you set up quickly with your GreenGeeks hosting account. You can find information about the site here. This is a self-onboarding process created with a step-by-step process.
Pick a theme
From the dashboard, make sure you go to Appearances > Themes
Click the “Add New” button after you’ve reached the Themes page. On the following screen, click the “Upload Theme” button.
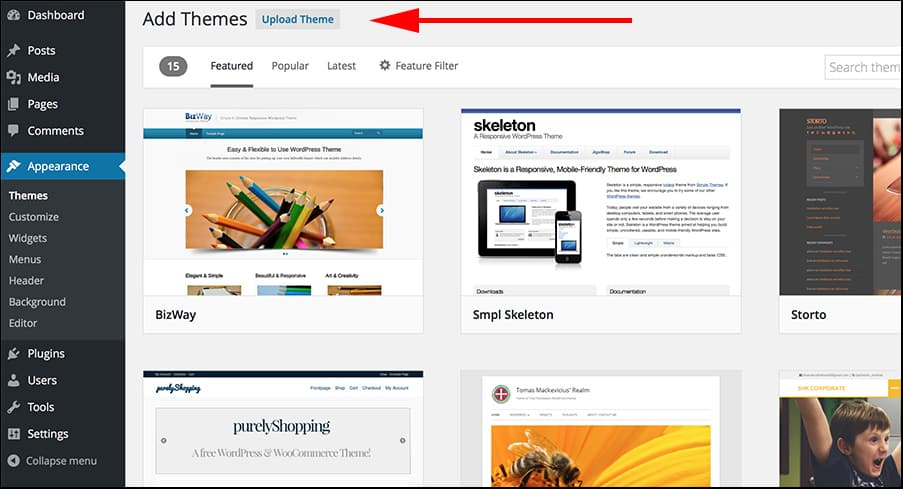
The theme that you downloaded from a third-party website is usually the entire.zip file that you downloaded from them. choose the file you downloaded After selecting the desired theme, click the “Install Now” option.
Once the theme has been installed, click Activate to enable the theme on your WordPress blog.
Select Plugins
You can choose a theme, add optional plugins, edit the site information (such as the title and description), and configure your SSL configuration.
The LiteSpeed cache plugin is installed by default, including all WordPress installations, and therefore does not require activation in the Plugins section.
How do I add SSL and its configuration?
SSL certificates are vital for establishing successful websites. This is due to the fact that it not only protects visitors, but search engines such as Google place more attention on sites that begin with “HTTPS://.”
When using GreenGeeks, it’s simple to add an SSL certificate. Log into GreenGeeks to continue.
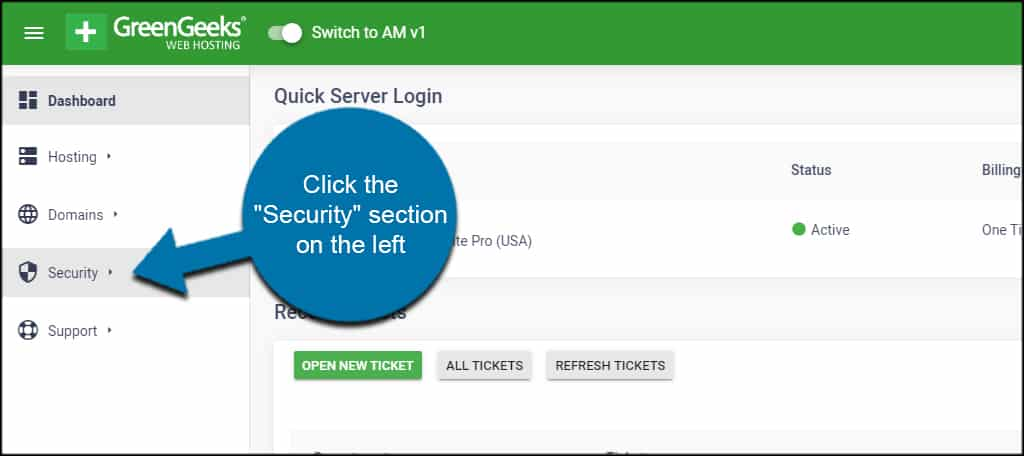
On the GreenGeek screens, click the “Security” option on the left.
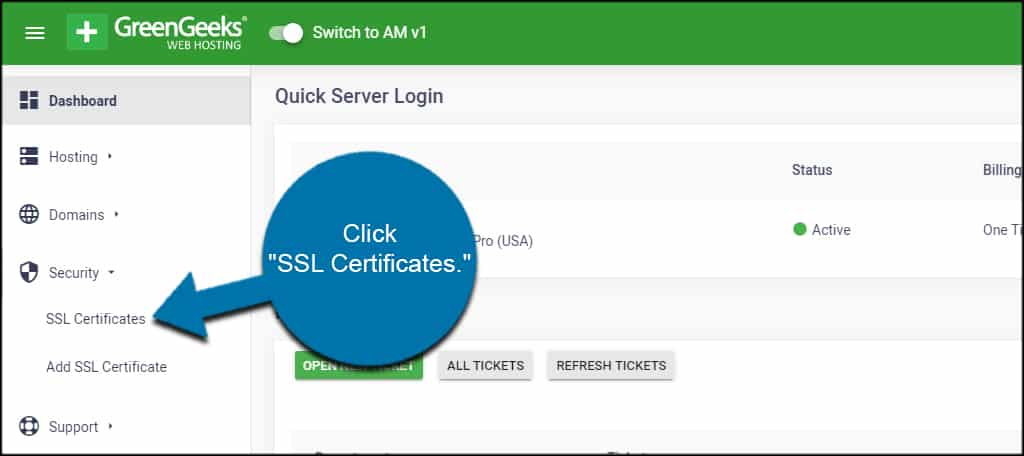
To see a list of SSL certificates, click the “SSL Certificates” drop-down list.
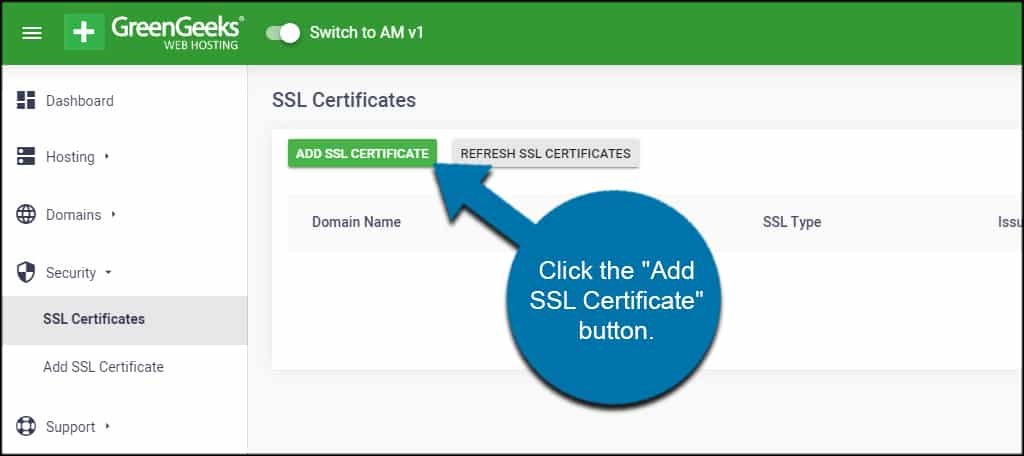
Click on “Add SSL,” located at the top of the page. Additionally, you can refresh the list of SSL certificates to determine if one is already installed.
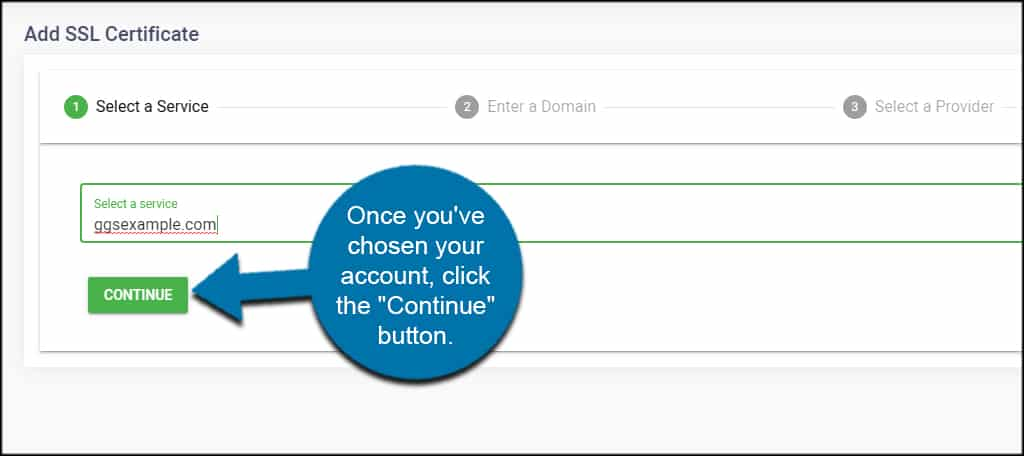
Select and choose your account; click on the ‘Select a service area. Most definitely, you should go with GreenGeeks for your primary domain.
Click the “Continue” button once you’ve decided on an account.
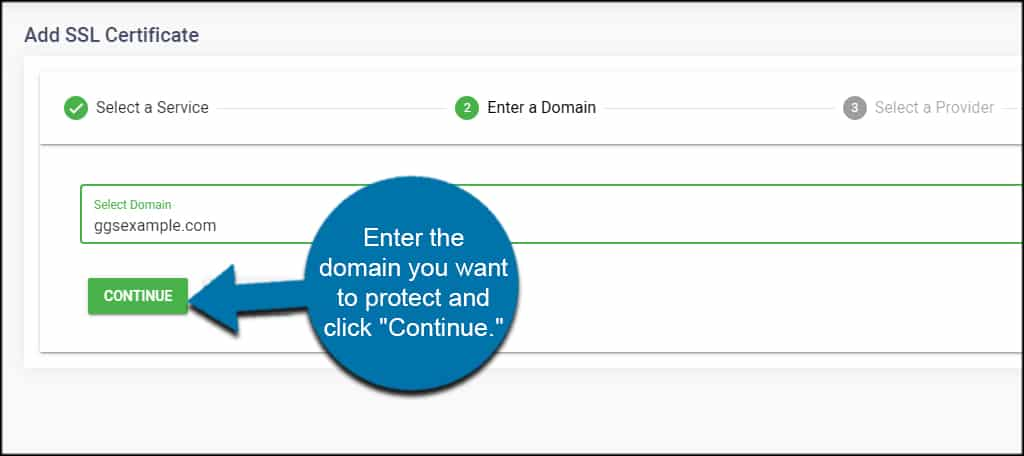
Please enter the domain or hostname you wish to protect, and then click “Continue.”
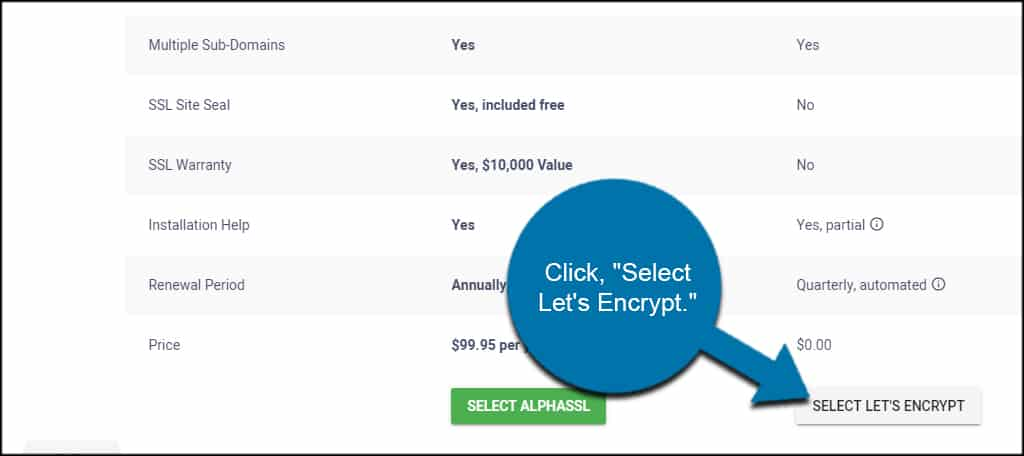
The following screen provides two options to select from:::: WildCard or Let’s Encrypt SSL. However, Let’s Encrypt is absolutely free, while AlphaSSL includes a fee. You can scroll down to the bottom of the screen and select the “Let’s Encrypt” option.
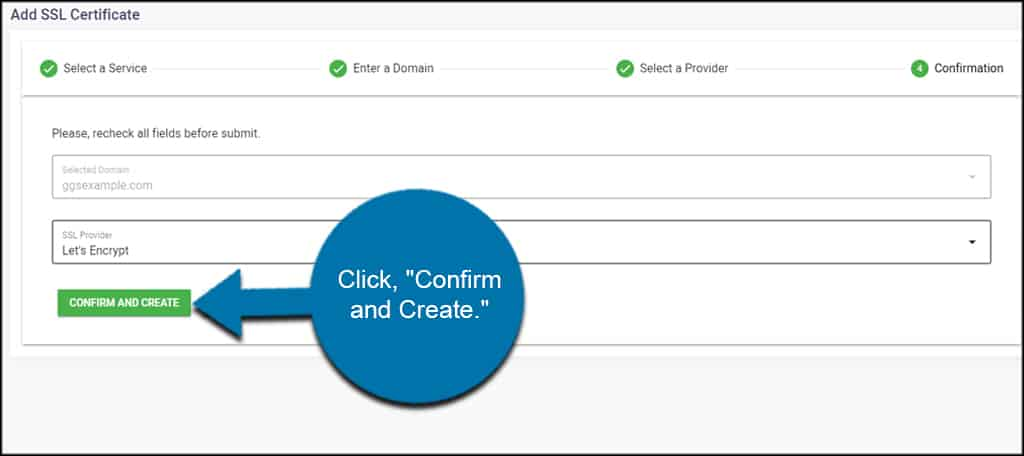
Verify that you picked the right domain for the certificate and that the SSL provider is Let’s Encrypt. Confirm and create the installation by clicking “Finish Setup.”
Then, on the following page, click the “Install SSL Certificate” button to activate the GreenGeeks auto-installer.
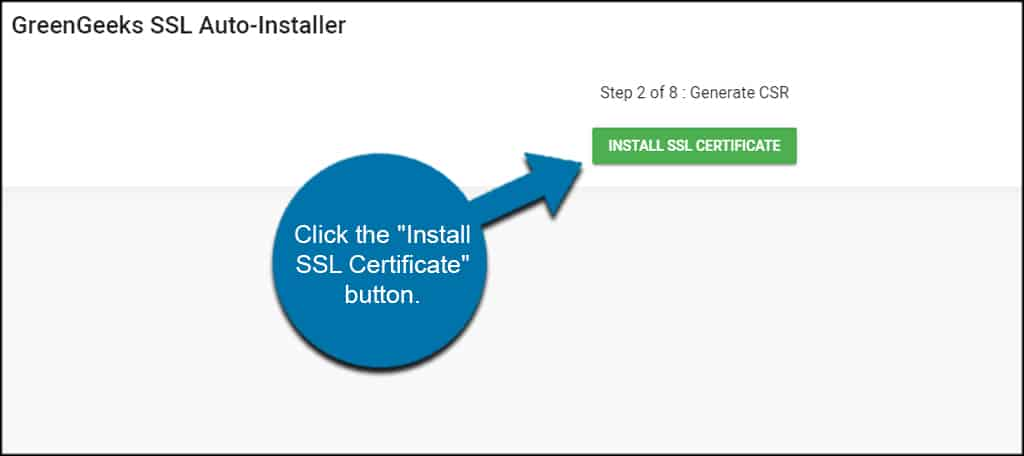
You can proceed with installing the SSL certificate by clicking “Install SSL Certificate….”. Once Let’s Encrypt has finished installing, you will have an SSL certificate for your GreenGeeks account.
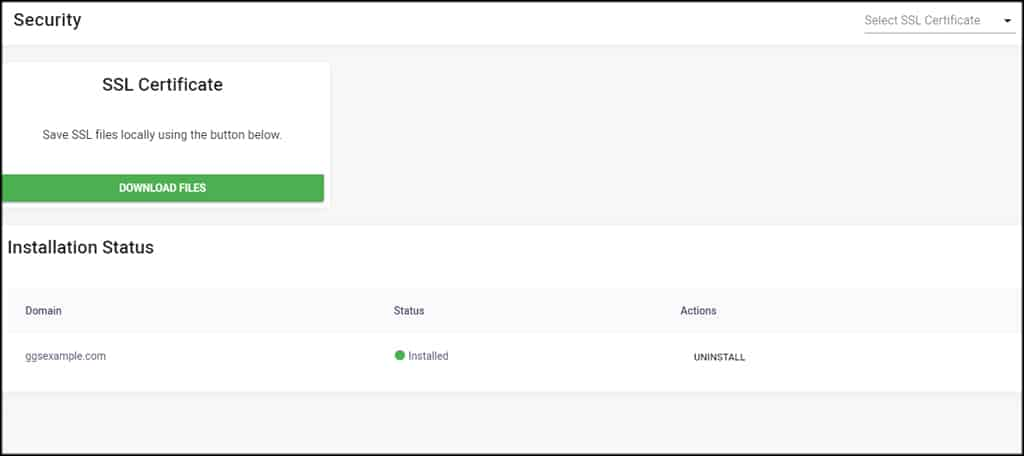
Confirm the setup
Once the installation is finished, you will be taken to a completion page where you will be provided with a WordPress login process and an automated login link to the site’s wp-admin.
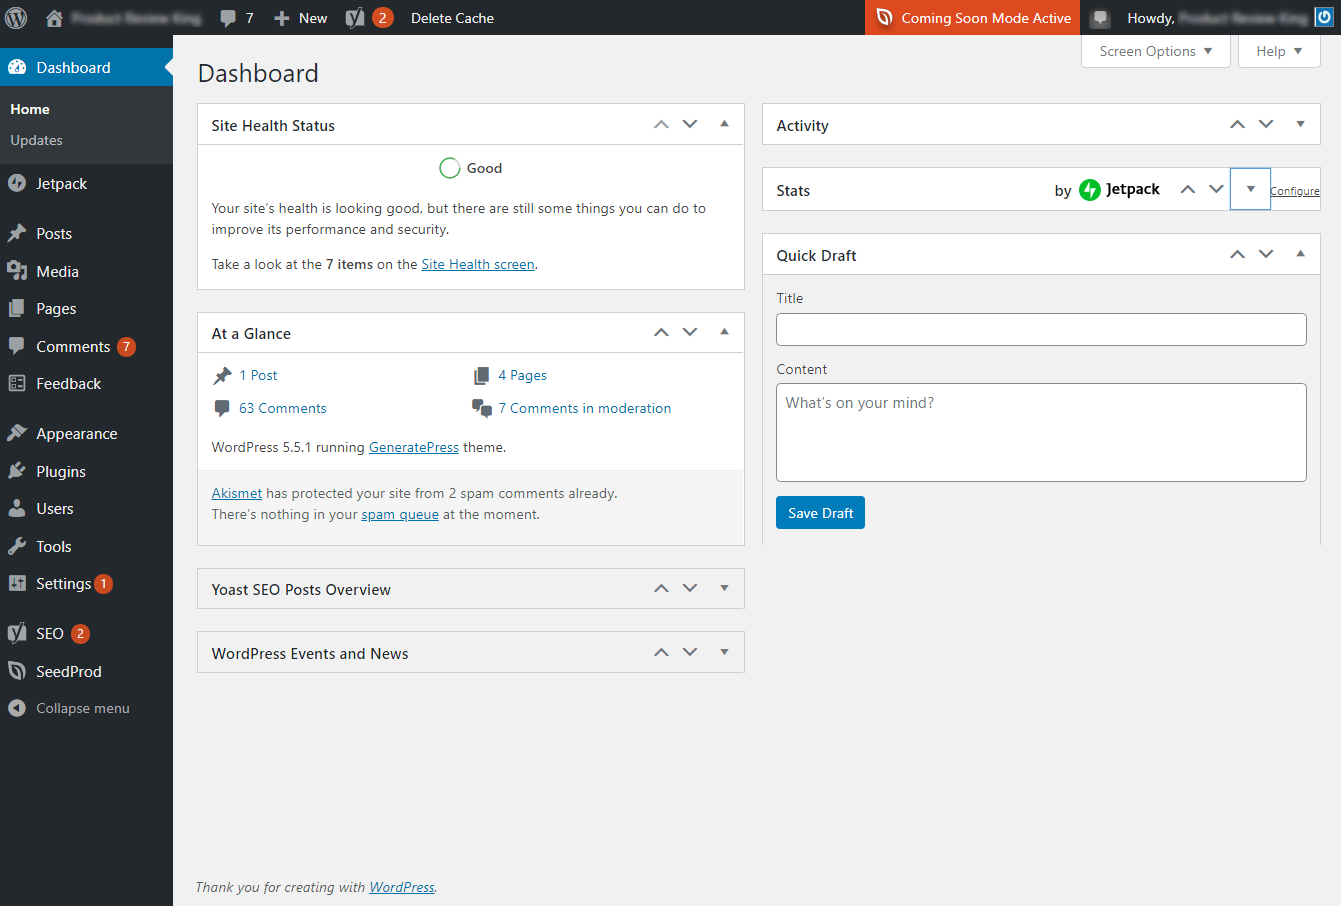
Go to the Dashboard.
The GreenGeeks dashboard is the central command-and-control station for the complete setup. You can build, manage, and install applications here.
In the email that GreenGeeks sent to you, you will find the email and password. You will be able to see the dashboard once you “log in” to your account.
Frequently Asked Questions (FAQs)
What is GreenGeeks web hosting?
GreenGeeks is the world’s top green energy web hosting provider, providing speedy, secure, and environmentally friendly web hosting services at competitive prices.
Is GreenGeeks hosting good?
Without a doubt, GreenGeeks web hosting has been around for almost 13 years and is reliable in terms of performance and pricing. It is because they have over 50,000 consumers who place their trust in them.
Is GreenGeeks good for WordPress?
Indeed, GreenGeeks WordPress hosting plans offer abundant features and excellent speed. Furthermore, their Quick Launch Wizard further enhances your complete blog-starting experience.
Do I get a free domain name with GreenGeeks?
Yes, all GreenGeeks plans provide a complimentary domain name for the first year.
How do I cancel GreenGeeks?
The plans for GreenGeeks include a 30-day money-back guarantee. So, if you are not satisfied with GreenGeeks, you can cancel your subscription to receive a complete refund, and then you can reach out to the GreenGeeks support service over the phone or via live chat.
Final words on How to start a WordPress blog
Is GreenGeeks hosting worth it? Finally, we laid out all the steps necessary to start a WordPress blog using GreenGeeks.
GreenGeeks’ quick-launch wizard tool is highly helpful for newbies who have limited expertise in building WordPress sites. This tool enables you to quickly and easily create a WordPress website with only a few clicks.
- GeneratePress Review 2026: Is It the Best WordPress Theme for Bloggers?
- Rank Math Review: The Ultimate Guide for WordPress SEO
- Rank Math Settings: How to setup SEO Plugin for better SEO?
- Kadence Theme Review: Best theme for WordPress Professionals
- Elementor Review: Is it a worthy Page builder plugin for WordPress?
In order for every reader who wants to start a new blog on GreenGeeks to successfully go through all of the steps outlined above, it is necessary that they read everything from start to finish.
When compared to other hosting companies, GreenGeeks is rather new. Their plans appear to be quite inexpensive, contain a plethora of wonderful premium features that appeal to beginners, and they also provide green web hosting plans.
The most important thing to know about GreenGeeks is that it is a good alternative to both SiteGround and Bluehost for hosting sites in the US. Feel free to ask any questions you may have if you are considering launching a blog on GreenGeeks Hosting.