
Step 8: Learn How to Use WordPress Blog (Basic Methods)
Now your WordPress blog is ready to start posting your content or articles. This step explains How to Use WordPress Blog for the first time. To do this, you need to know the essential points on Post-Creation, Images uploading, and Blog comments managing. Once you learn these basics you can dive on WordPress, now you will be really able to customize all aspects of the WordPress blog.
To this, I am providing a simple tutorial guide and follow along with guides below.
If you are still facing the problem by following the above and present tutorial, do not hesitate to contact me at any time.
How to use WordPress Blog After New setup and Configuration?
The creation of a new post or Page in WordPress is very simple. It allows you to make new web content, whether it is an article or other content. This is the good and one of the main feature that will allow you will be using WordPress.
How to create a new WordPress post?
To start the WordPress post creation, you need to go to Posts>Add New from the left side column on the WordPress dashboard.
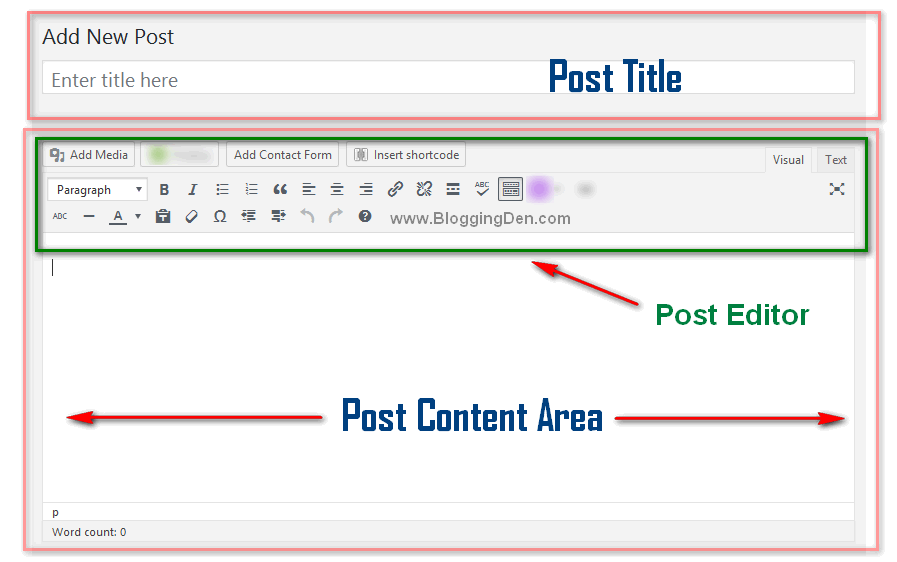
In this screen page, you will find two important things, they are
- Post title: This is the top thing on the page. You must add the content title here.
- Post Content: This is the actual place to add textual information, images, and Videos. You can see this area in full coding mode (HTML mode) or Visual mode (Text mode).
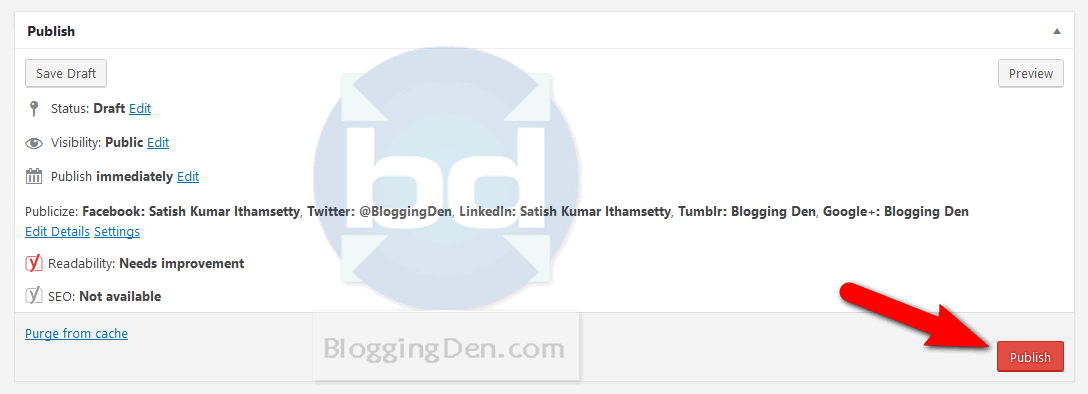
After finishing your post writing, you need to check the post content grammatical errors, arrangements and finally, click on “Publish” button for viewing by others.
After publishing the post, you will be able to check the post from the blog home page.
Additional Readings:
- Why Publishing Blog Posts on Facebook Can Help Increase Your Blog Engagement
- 8 Secrets of Cool Eye Catchy Headlines for Your Blog Posts
- How To Publish And Write Posts Using WordPress
- Top List of Attractive Titles to Increase Your Post Click Rates
Basic Options in Publish Panel

How to Add Images or Multimedia items within your Posts?
This is the second part of this step on How to Use WordPress Blog first time. By following the above new post/page creation, you need to add images or other multimedia format, which ensures your content interest and uniqueness.
If you add images or videos along with Text stays engaging, and the user can understand the content easily. In the WordPress blog, this is very easy. To start this, open the page/post where you intend the media file.
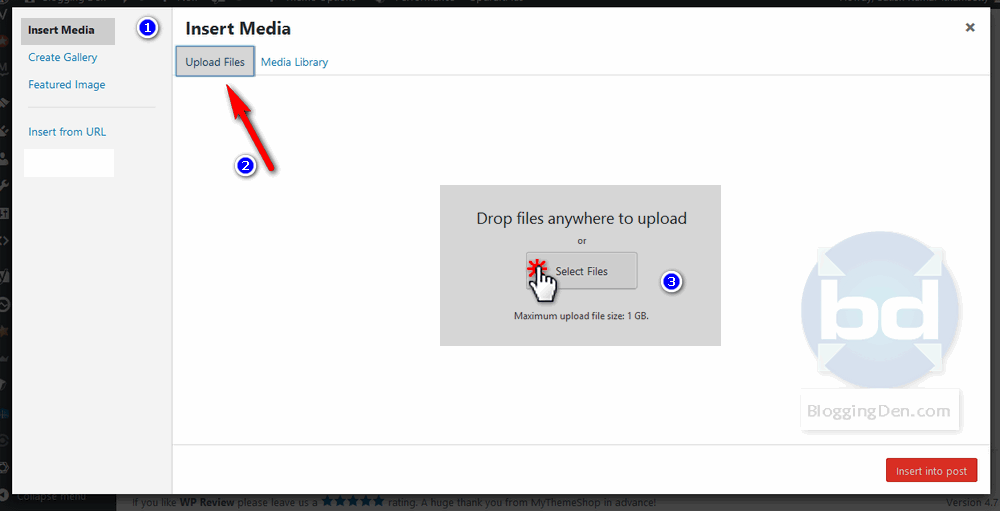
To do this, go to the page/post and click on the “Add Media” button. It takes you to the Upload featured screen.
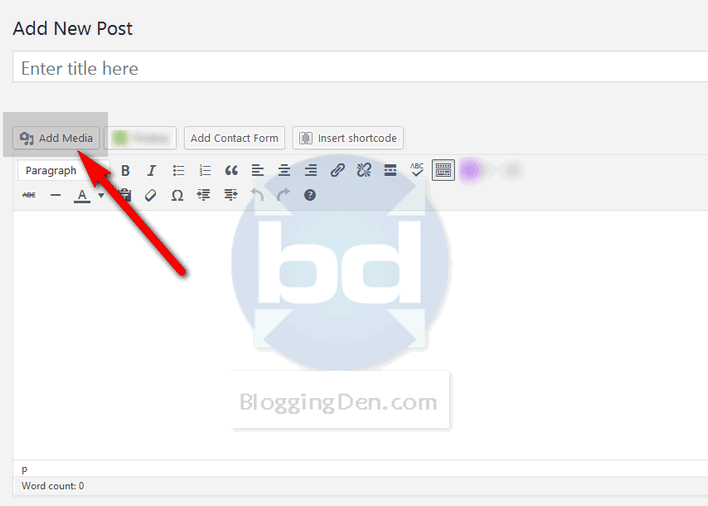
In the box click on “Insert Media > Upload Files,” then just click on Select Files button and choose the file to upload and place it within the content. It gives the option to find the files from your PC or network.
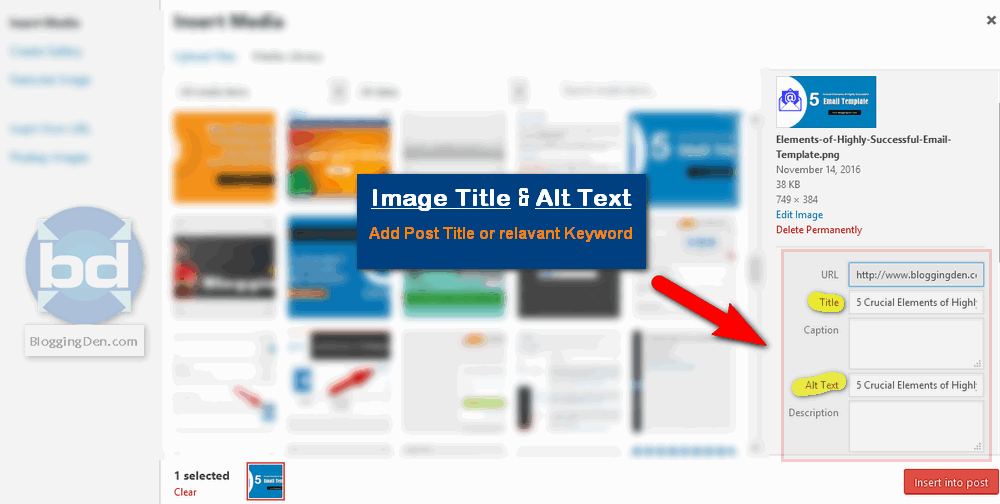
Once the file is chosen, click on the Upload button and finally click on Insert into Post. You can use the Image or Video within the post which is suitable at a correct place. Before putting the image, you need to do smart Image SEO. This is simple. Just fill the Title and Alt text with your primary keyword. Here I am using Post title in my blog images because post titles are already optimized with On-Page SEO basis. So it has the main keyword.
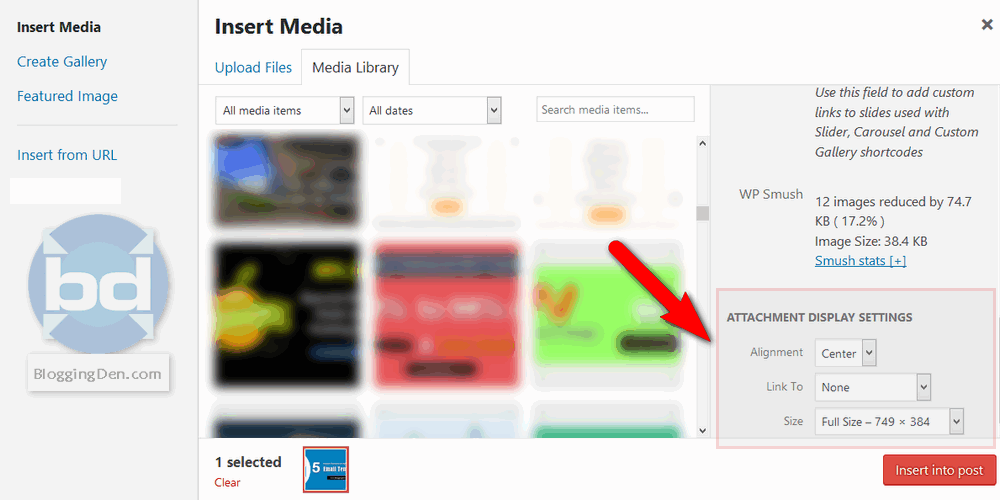
After that, you need to adjust the basic and specific elements of the image to place within the content correctly.
- Alignment: In the image alignment, there are three locations like the Centre, Left, and, Right. This option is to move the image and adjust at proper placement within the content.
- Link: This is the option to place the hyperlink. When you add the URL, It helps you to redirect the page to another post or page or another website when the user clicks on the image.
- Size: Choose the best dimensions which are suitable for your post. Personally, I am suggesting Full-size image become your page looks clean and unique.
After this adjustment in the proper way (mentioned above), now place the media file within your content by clicking the button “Insert into post.” The image/media file will be inserted automatically.
Finally, update the post/page by clicking the Save as a draft. Click the preview to see the newly added image placement.
How to manage and moderate Comments in WordPress Blog?
Comments moderation and dealing are very easy in WordPress blog. Every user interacts with the post author by using the commenting system. Generally, it is located at the bottom of the blog post. Most of the people are leaving their opinions, queries about the content from the commenting section.
This is a very helpful and useful service available in WordPress. You must visit and manage the existed comments by separating the spam comments. Remove any the spam comment immediately if you find. To use WordPress blog for the first time, you need to check the comment moderation settings once.
This comment moderation is significant to secure your blog post from spamming. It helps you to give your business an authentic and feel.
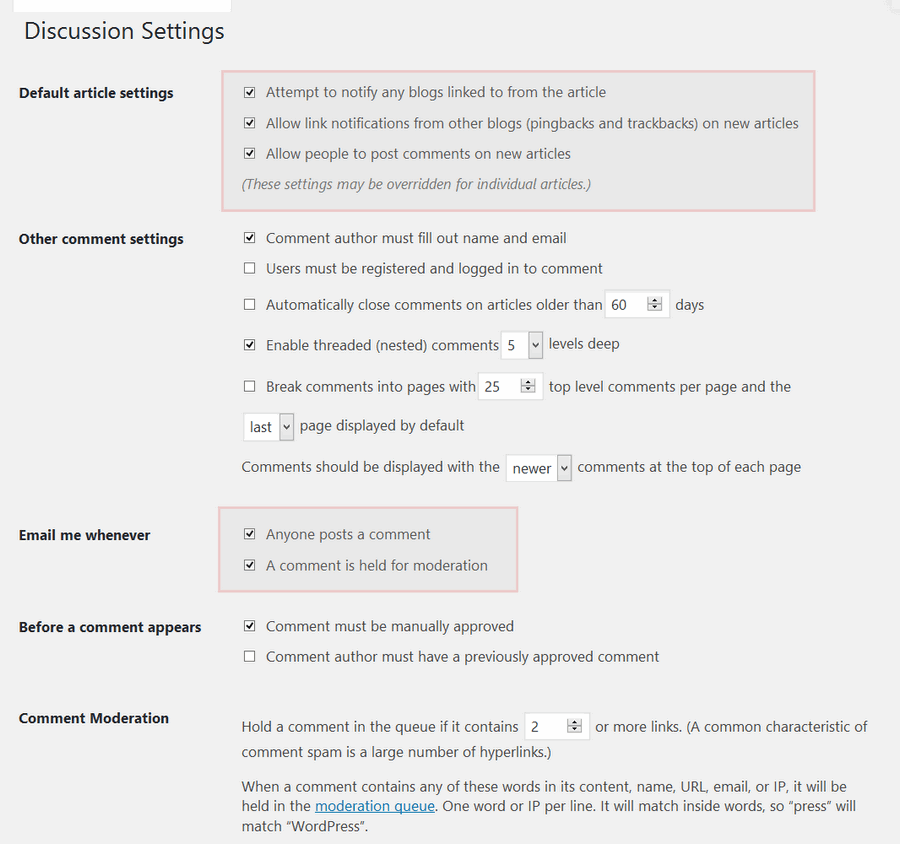
To manage comments, first, you need to go “Settings > Discussions” from your WordPress dashboard.
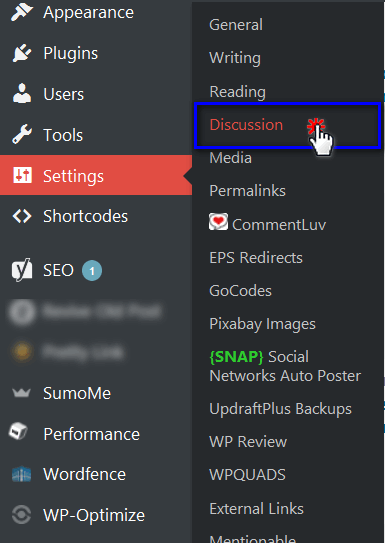
In the Discussions page, configure the options as you required. Now let you adjust things like below;
- Allowing Comments in the First place: If you do not want to comment section within your blog post, just turn it off. Note: If you disable the section, this will change the settings for ALL posts.
- Approvals: This is an important option. If you enable this option, every comment will be going to moderation. The comments will be appearing after approval by the blog admin. It helps you to stop the spam, and abuse from emerging.
So every comment is protected and moderated securely by choosing the proper options from the Discussion settings page. The other option to protect your blog from Spam comments is using of Akismet Plugin.
Installation and configuration of this Akismet plugin are very easy. To do this go to Plugins > Add new and search for the name “Akismet”. In the result page, click on the Install button of Akismet plugin and activate it.
After activation of the plugin, go for Akismet settings page, click on Get API key button. Create a new account in Akismet homepage, choose a Free option, fill the details like name and email then click Signup. The API key will be added to your blog.
The plugin comes with the built-in features of spam-sending Emails and usernames. So do not install this Plugin immediately in your blog without wasting time.
Now your blog is Spam Free blog.
Recommended Resources
[wptb id=28902]
GeneratePress is one of the free, lightweight, SEO optimized, Page builder-friendly, and best rated WordPress theme. Take an action for you designing projects for better WordPress Performance.